Contents
- Overview
- Configure DB Replication
- Configure Nodes
- Configure Layer 7 Nodes
-
Configure LB with pfSense
- Install pfSense
- Overview
- Turn on Layer 7 pingServlet.mode
- Config pfSense Load Balancer
- Add Virtual Monitors
- Check Load Balancer Status
- Open WAN Firewalls for Port 8080 and 8443
- Open LAN Firewalls for both Port 8080 and 8443
- Check that Load Balancer is Listening on both Port 8080 and 8443
- Point Layer 7 Policy Manager to Load Balance IP
Overview
* Gateway cluster nodes share:
– service policies
– identity providers
– configuration settings
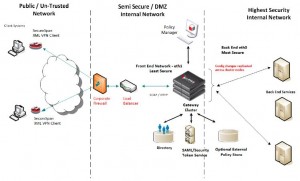
Architecture
System Requirements
* Load Balancer device to provide TCP-level load balancing and failover
* Each node must possess its own host name, IP, and original node address within the LB
* Cluster must possess a host name and IP in LB
* Two nodes of the cluster must be installed and configured with the MySQL database with known root user names and root user passwords
Overview of Creating a new Gateway Cluster
* Configure db replication on both Gateway db nodes
* Configure the first node
* Configure subsequent nodes
* Start cluster
* Create CA key for the cluster
* Install and configure LB on the network
Configure DB Replication
* Maximum two MySQL db servers can be configured in a cluster
* Each peered db unit becomes both a slave and master to the other unit, i.e. master-master replication
System Requirements
* Both db servers have host names and IPs in DNS or /etc/hosts
* Both MySQL services are running
* Both Gateway services stopped
* Time synchronized among all Gateway nodes
Configure Replication
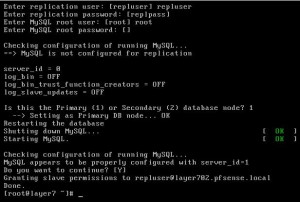
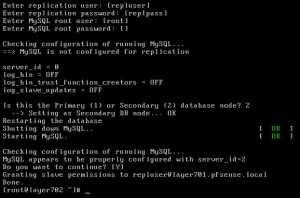
Run add_slave_user.sh Script
Run the following script against the local db on each node to add permissions for the users to MySQL:
service ssg stop
/opt/SecureSpan/Appliance/bin/add_slave_user.sh
You need to enter:
* For layer701:
– hostname or IP for the
– replication user (defaults to repluser): repluser
– replication password: Welcome1
– MySQL root user: root
– MySQL root password: 7layer
– Is this the primary (1) or Secondary database node? 1
* For layer702:
– hostname or IP for the
– replication user (defaults to repluser): repluser
– replication password: Welcome1
– MySQL root user: root
– MySQL root password: 7layer
– Is this the primary (1) or Secondary database node? 2
Run create_slave.sh Script
Run the following script against each db node to setup the replication to run between the two databases, using the user configured in the previous add_slave_user.sh script. This sets up the other db as master:
/opt/SecureSpan/Appliance/bin/create_slave.sh
* For layer701:
– hostname or IP for the MASTER: layer702.pfsense.local
– replication user: repluser
– replication password: Welcome1
– MySQL root user: root
– MySQL root pass: 7layer
– Do you want to clone a database? no
* For layer702:
– hostname or IP for the MASTER: layer701.pfsense.local
– replication user: repluser
– replication password: Welcome1
– MySQL root user: root
– MySQL root pass: 7layer
– Do you want to clone a database? no
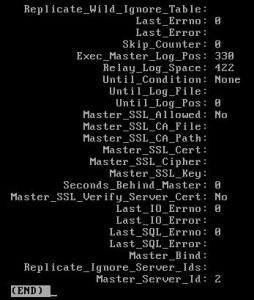
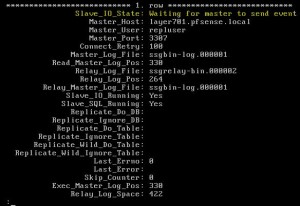
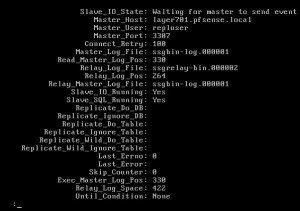
Verify replication has started
mysql
pager less
show slave status\G
* For layer701:
* Forlayer702:
* If not, you can re-create replication process:
/opt/SecureSpan/Appliance/bin/create_slave.sh
Monitor Replication Failure
* Cluster properties for minitoring of replication delays or failures:
– db.replicationDelayThreshold: threshod before Gateway audits a warning for slow or failed replication. Defaults to 60 sec
– db.replicationErrorAuditInterval: minimum interval between db replication failure audits. Defaults to 60 min
* Replication events being audited:
– Replication failure
– Replication recovery
– Database failure
Restart Replication
* Run against local db on each node:
/opt/SecureSpan/Appliance/bin/restart_replication.sh
and enter:
– hostname or IP for the MASTER: # the other node
– replication user: repluser
– replication password: Welcome1
– MySQL root user: root
– MySQL root password: 7layer
Configure Nodes
* Make sure db replication has been configured correctly!
* Reboot?
Configure First Node: layer701
* Login first node as ssgconfig
* Select option 2 (Display Gateway configuration menu)
* Select option 2 (Create a new Gateway database)
* Restart appliance
Configure Additional Node
layer702
* Login node as ssgconfig
* Select option 2 (Display Gateway configuration menu)
* Select option 3 (Configure the Gateway)
– Database Host: enter hostname for db server 1: layer701.pfsense.local
– Database Port [3306]:
– Database Name: use value for the first node: ssg
– Database username and database password: use values for first node: gateway/welcome1
– Cluster password: use value for first node: welcome1
* Ensure the node is enabled and then press [Enter] at the configuration summary.
* Restart appliance
Configure Name Resolution
* It is expected that each node of the Gateway cluster can resolve the IP address of the cluster and all other nodes by DNS.
* If DNS is not configured to provide this, then each node must do so via the “/etc/hosts” file.
Start Cluster
* Start primary node
* Start other nodes
Configure a CA Key for the Cluster
Deactivating a Cluster Node
Configure Layer 7 Nodes
Configure Node 1
IP: 192.168.2.61
Net mask: 255.255.255.0
Gateway: 192.168.2.1
Name server: 192.168.2.1
NTP server: pool.ntp.org
Configure Node 2
IP: 192.168.2.62
Net mask: 255.255.255.0
Gateway: 192.168.2.1
Name server: 192.168.2.1
NTP server: pool.ntp.org
Configure LB with pfSense
Install pfSense
* See this post to install pfSense.
Overview
* IP addresses:
– Cluster IP: 192.168.1.60
– Node IP addresses: 192.168.2.61, 192.168.2.62
* Configure the virtual server
* Configure session persistence
– Ensure LB session timeout limit is set to 30 min
* Configure service availability determination
– Set check frequency to 120 sec
– Set response timeout to 120 sec
– For port 8080, set communication type to “Normal”
– For port 8443, set communication type to “SSL”
– Configure ports 8080 and 8443 to check the URL “/ssg/ping” (defaults to 8443 SSL with HTTP basic credentials in the request)
– An “OK” message for successful ping
Note: you need to set pingServlet.mode to OPEN from Layer 7 Policy Manager in order to get an OK message by hitting /ssg/ping
Turn on Layer 7 pingServlet.mode
* Log in Layer 7 Policy Manager
* Go to Tasks > Manage Clust-Wide Properties
* Set
– pingServlet.mode to OPEN
Config pfSense Load Balancer
* Log in pfSense web console
Add Monitors
* Go to: Services > Load Balancer > Monitors
* Add a new monitor:
– Name: Layer7Mon8080
– Description: Layer 7 cluster monitor on port 8080.
– Type: TCP
* Add another new monitor:
– Name: Layer7Mon8443
– Description: Layer 7 cluster monitor on port 8443.
– Type: TCP
Add Pools
* Go to: Services > Load Balancer > Pools
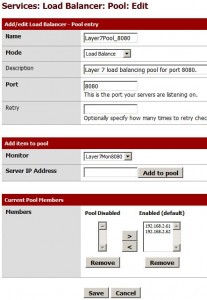
* Add a new pool
– Name: Layer7Pool_8080
– Mode: Load Balance
– Port: 8080
– Monitor: Layer7Mon8080
– Members: 192.168.2.61, 192.168.2.62
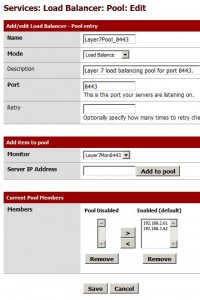
* Add another pool
– Name: Layer7Pool_8443
– Mode: Load Balance
– Port: 8443
– Monitor: Layer7Mon8080
– Members: 192.168.2.61, 192.168.2.62
Add Virtual Monitors
* Go to: Services > Load Balancer > Virtual Servers
* Add a new virtual server:
– Name: Layer7vs8080
– Description: Layer 7 virtual srever on port 8080.
– IP Address: 192.168.1.60 (This is the WAN public IP)
– Port: 8080
– Virtual Server Pool: Layer7Pool_8080
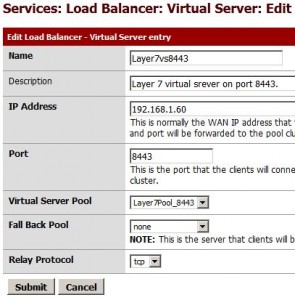
* Add another virtual server for port 8443:
– Name: Layer7vs8443
– Description: Layer 7 virtual srever on port 8443.
– IP Address: 192.168.1.60 (This is the WAN public IP)
– Port: 8443
– Virtual Server Pool: Layer7Pool_8443
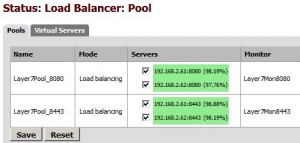
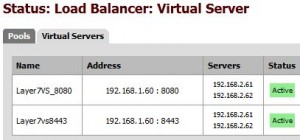
Check Load Balancer Status
* Login pfSense console
* Go to: Status > Load Balancer
* Check all pools are green:
* Check all virtual servers are green:
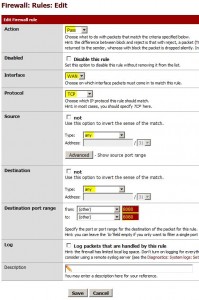
Open WAN Firewalls for Port 8080 and 8443
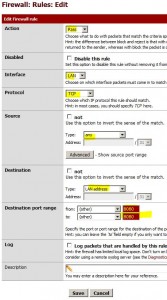
* Go to Firewall > Rules
* Open port 8080:
* Do the same to open port 8443:
Open LAN Firewalls for both Port 8080 and 8443
Check that Load Balancer is Listening on both Port 8080 and 8443
telnet 192.168.1.60 8080
telnet 192.168.1.60 8443

