Contents
This is the instruction from my friend and colleague Peter Scalise. I reformatted it and added screen shots.
On the Windows Machine
* Create the shared folder on the Windows side to be shared with VM, e.g. c:\vmshare
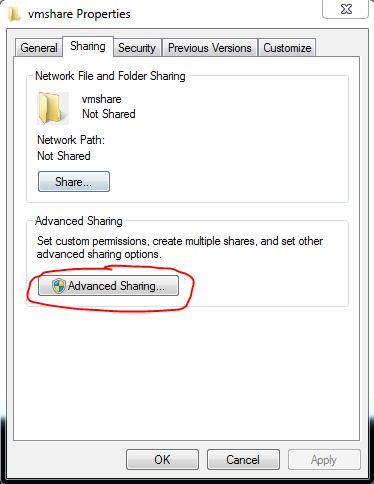
* Right click on the newly created shared folder, e.g. c:\vmshare, and select Properties
* Select the “Sharing” tab
* Click the button “Advanced Sharing”
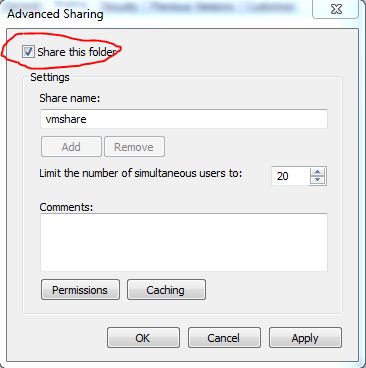
* Enable the “Share this folder” checkbox
* Enter “vmshare” in the “Share Name:” field
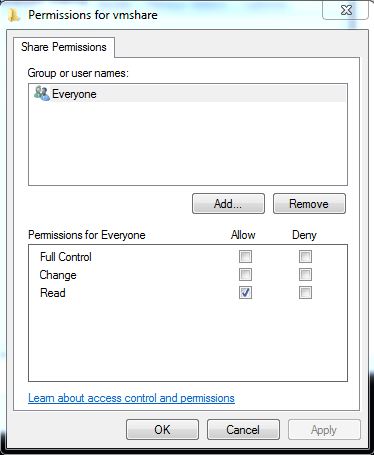
* Click the “Permissions” button and grant read access to “Everyone”
* Click OK buttons to exit
On the Oracle VM VirtualBox Manager
* Highlight the VM instance
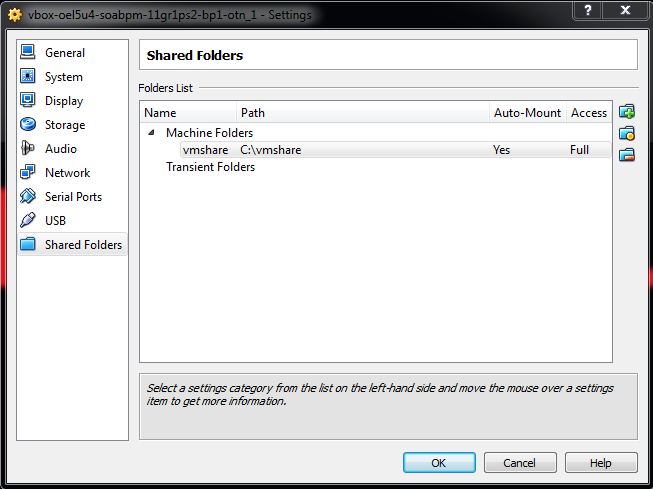
* Navigate to Machine/Settings…/Shared Folders
* Right click on “Machine Folders” and select Add Shared Folder to create a new shared folder
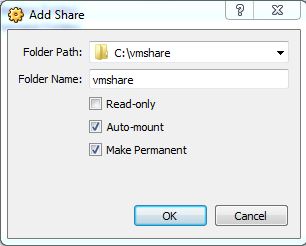
* In the “Folder Path” enter the full Windows path for the folder you shared in step above, in this case c:\vmshare. Optionally, you can browse to the shared directory created previously.
* In the “Folder Name” enter one alpha-numeric string of text for share name. This can be arbitrary, but unlike the windows share name you will use this share name in a step below. For this example we will use “vmshare”
* Enable the “Auto-mount” option
* Enable the “Make Permanent” option
* Click OK to close the “Add Share” window
* Click OK to close the “Settings” window
* Start the VM and use the running instance
* Open a Linux terminal and su as root user
* Create a directory to use as a mount point for the shared folder, for example, /vmshare
* Change permissions on directory just created: chmod 777 /vmshare
* Run the following command to mount the shared folder:
mount -t vboxsf linShare /home/vmshare
* For example
su -
mkdir /vmshare
chmod 777 /vmshare
mount -t vboxsf vmshare /vmshare
Auto Mount
* Shared folders are automatically mounted under directory /medea/sf_sharefolder, e.g. /media/sf_vmshare.
Test
* On Windows machine, drop a test file onto the C:\vmshare directory
* On VM Linux instance, you should see the test file in the /vmshare directory

