Contents
- Overview
- Policy Manager
- Menus
-
Tasks
- Manage Cluster-Wide Properties
- Manage Stored Passwords
- Change your own password
- Manage Password Policy
- Manage Listen Ports
- Listen Port Properties
- Manage Interfaces
- Manage JDBC Connections
- Manage JMS Destinations
- Manage Email Listeners
- Manage Roles
- Manage Log Sinks
- Managing HTTP Options
- Manage Service Resolution
- Manage SFTP Polling Listeners
- Working with SCP/SFTP Messages
- Manage KeyStore
- Working with Services
- Working with Internal Services
- Publish Test Service
- SecureSpan Policy Language
- References
Overview
Layer 7 Gateway
* Layer 7 Gateway is a policy-optimized and ASIC-accelerated (Application Specific Integrated Circuit) XML Firewall and Web Services gateway that
– protects and controls how shared web services are accessed by and exposed to external applications.
* Layer 7 Gateway comes in three form factors:
– Virtual applicance. See this post on how to install Layer 7 virtual appliance.
– ASIC-accelerated DMZ appliance. ASIC stands for application specific integrated circuit.
– 64-bit ASIC-accelerated appliance for EAI or ESB.
SecureSpan XML VPN Client
* Is a cross-domain enablement product designed to speed and secure web services integrations spanning identity and security domains.
* Available in three form factors:
– Class lib
– Executable
– Integrated inside a Gateway for drop-in partner connectivity and web services federation
Policy Manager
* GUI based application (either standalone or browser based) that allows administrators to centrally define, provision, verify, and audit fine-grained security and connectivity policies for cross-domain web services and XML integrations.
* Available as software for:
– Windows
– RHEL
– Solaris
– SOAP API
Policy Manager
Policy Manager Clients
* Web: https://layer7:8443/ssg/webadmin/
* Standalone GUI
Start Policy Manager
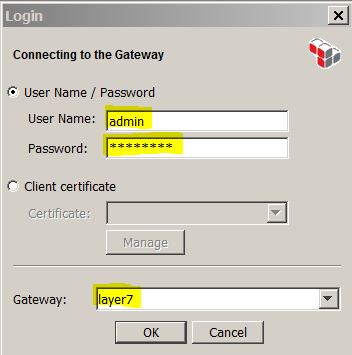
* Login
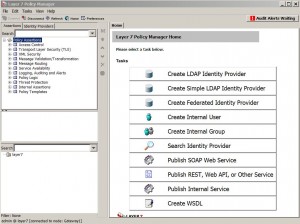
* Home page
Menus
File Menu
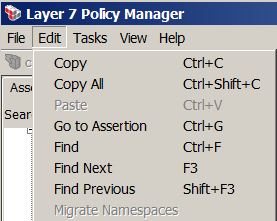
Edit Menu
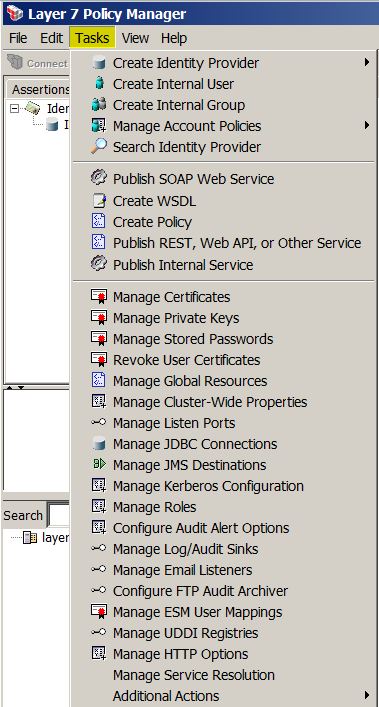
Task Menu
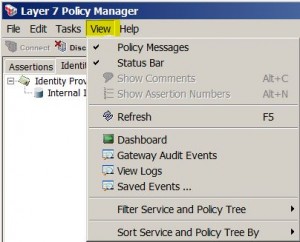
View Menu
Help Menu
Tasks
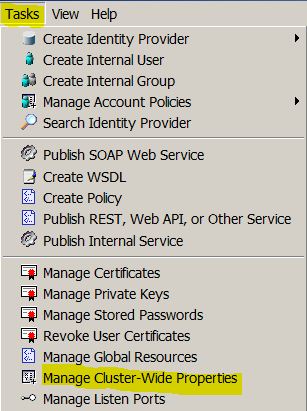
Manage Cluster-Wide Properties
* Cluster-Wide properties are accessed with notation: ${gateway.clusterProperty}
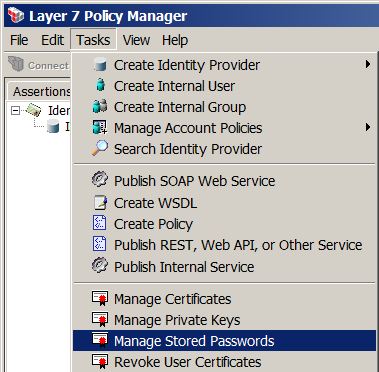
Manage Stored Passwords
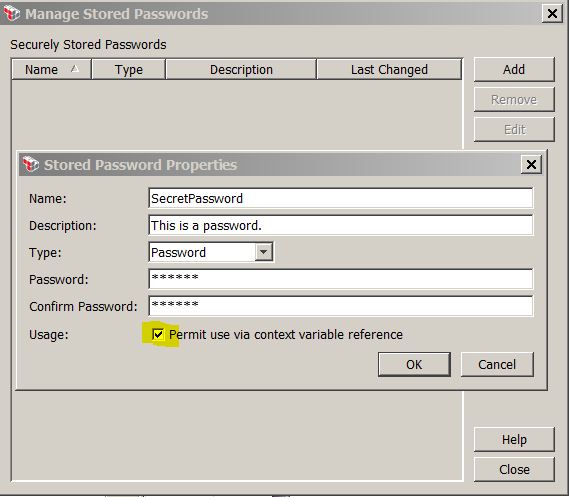
* Add a new password:
* Edit a password:
* When Permit use via context variable reference is checked, the password can be referenced by ${secpass.*} context variables.
Change your own password
* By default, passwords are cached for
– 60 seconds if authenticated
– 30 seconds if not authenticated
* 15 seconds are needed for password changes to propagate through the cluster nodes.
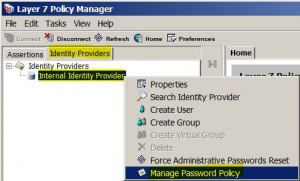
Manage Password Policy
* Force Administrative Passwords Reset
Manage Listen Ports
Listen Port Properties
Manage Interfaces
* Interfaces can be monitored by a listen port
* Interfaces can be configured to listen on one or more IP addresses
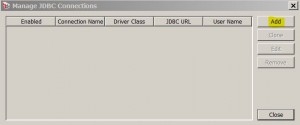
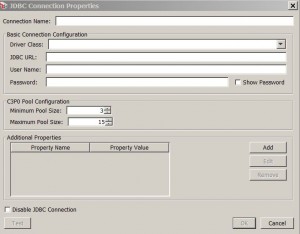
Manage JDBC Connections
* Allow the Gateway to query external databases and then use the query results during policy consuption.
* Menu: Task > Manage JDBC Connection
Manage JMS Destinations
TODO
Manage Email Listeners
* Used to periodically poll an email server for SOAP messages to process.
* Supported email server types:
– POP3
– IMAP4/IMAP4rev1
* Supports SSL encryption
– can use internal trust store for trusting email server certs
* Menu: Task > Manage Email Listeners
* Create a new mail listener:
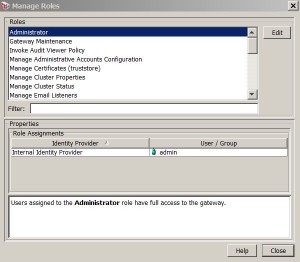
Manage Roles
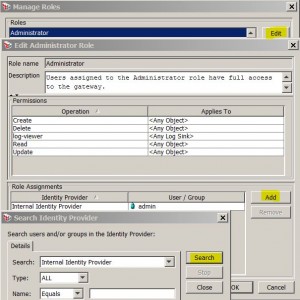
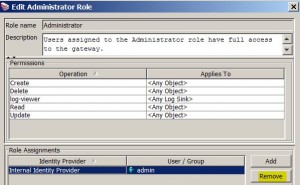
* Menu: Task > Manage Roles
* Add user to role:
* Remove user from role:
Manage Log Sinks
* Menu: Task > Manage Log/Audit Sinks
* Mange log sink:
* Mange audit sink:
Managing HTTP Options
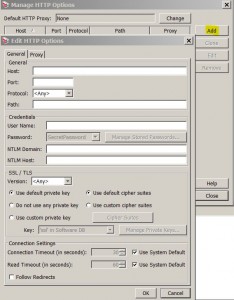
* Used to configure options to be used by the Gateway for outbound(?) HTTP(S) connections:
– login credentials for an HTTPS host
– define a proxy for the host
– specify a private key to be used for authentication
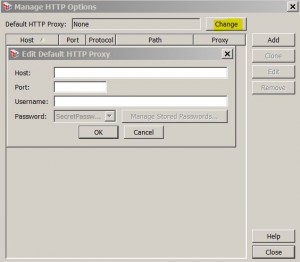
* Also used to edit the default HTTP proxy settings
* Menu: Task > Manage HTTP Options
* Add an HTTP option:
* Set default HTTP proxy:
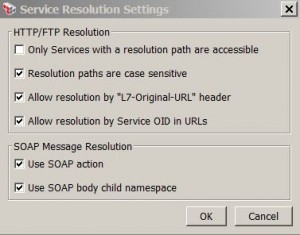
Manage Service Resolution
* Menu: Task > Manage Service Resolution
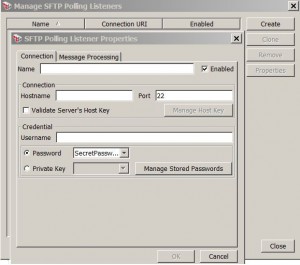
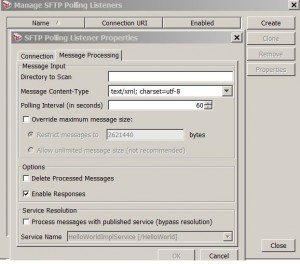
Manage SFTP Polling Listeners
* Menu: Task > Additional Actions > Manage SFTP Polling Listeners
* Connection setting:
* Message Processing setting:
Working with SCP/SFTP Messages
The Layer 7 Gateway supports SCP (Secure Copy Protocol) and SFTP (SSH File Transfer Protocol) messages, both inbound and outbound. This allows the Gateway to work with backend services which rely on these protocols. These messages are secured using the SSH2 protocol (SSH1 is not supported).
* Using Inbound SSH:
– configure an internal SSH server running on a Gateway listen port. This is done by creating a new listen port using the SSH2 protocol.
– The SSH listener supports inbound SCP upload and inbound SFTP PUT commands to the Gateway.
– This listener automatically opens and closes the SSH port on start and stop.
– Can use both password authentication or pki authentication.
* Using Outbound SSH:
– outbound SCP upload and download with an external SCP server
– outbound SFTP “PUT” and “GET” with an external SFTP server
Manage KeyStore
Working with Services
Publish Services
* Web services from existing WSDL:
– use Publish SOAP Web Service Wizard
– Default Gateway URI:
http://layer7:8080/ssg/soap
https://layer7:8443/ssg/soap
* Web services require the generation of a new WSDK:
– use Create WSDL Wizard
* Non-SOAP applications:
– use Publish REST, Web API, or Other Service Wizard
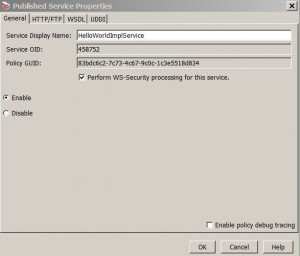
Service Properties
* Accessed by right clicking and select Service Properties.
* General properties:
– Rename service display name
– Disable/enable service
– Enable WS-Security processing
– Enable policy debug tracing
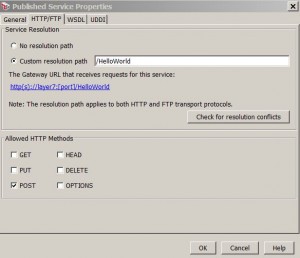
* HTTP/FTP properties:
– Change resolution path
– Check resolution conflicts
– Change HTTP methods
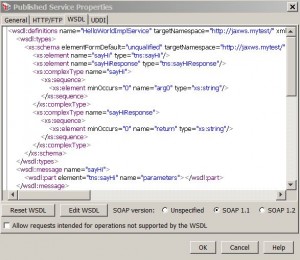
* WSDL properties:
– Reset WSDL
– Edit WSDL
– Change SOAP version
– Allow requests intended for operations not supported by the WSDL
* UDDI properties
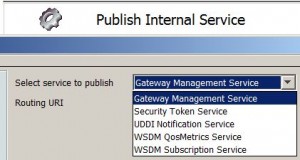
Working with Internal Services
Gateway Management Service
* expose Gateway Management API
Security Token Service (STS)
* requires WSDL
* uses various tokens, e.g. Create SAML Token, Create Security Context Token
UDDI Notification Service
* Notifies client about changes in UDDI registry: Handle UDDI Subscription Notification assertion
WSDM QosMetrics Service
* Allows client to request metrics data for a given managed resource.
* Has one method:
– GetMultipleResourceProperties
WSDM Subscription Service
* Allows client to subscribe to receive notifications about changes in a resource
* Has three methods:
– Subscribe
– Renew
– Unsubscribe
Specifying a Resource for an WSDM Service
* Include resource id within the URL:
http://
* Include service id as part of the SOAP message:
<ResourceId>http://ssghost:8080/service/hello</ResourceId>
* Include resource URI within the URL of the query string:
http://
Working with Security Token Service (STS)
* STS issues following tokens:
– SAML tokens using Create SAML Token assertion
– Security Context tokens using Create Security Context Token assertion
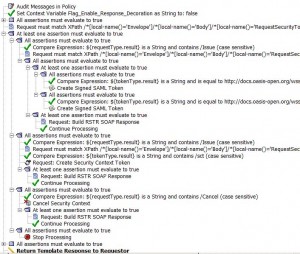
* Issued tokens can be returned in a Request Security Token Response (RSTR) using Build RSTP SOAP Response assertion
* Security Context tokens can be cancelled using the Cancel Security Context assertion
* Publish STS:
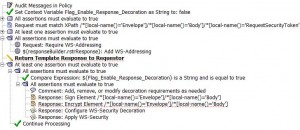
* Default STS policy:
* Sample Messages
Working with FTP Requests
Publish Test Service
Public Test Service
* Click Home > Publish SOAP Web Service
– Or click Tasks > Publish SOAP Web Service
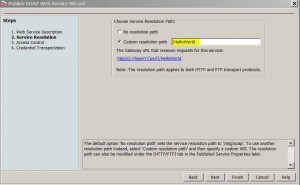
* Enter WSDL location, e.g., http://openidmbox:8080/cxf-jaxws-one-1.0-SNAPSHOT/HelloWorld?wsdl and click Next:
* Select Custom resolution path and enter value /HelloWorld
* Click Finish to accept all defaults.
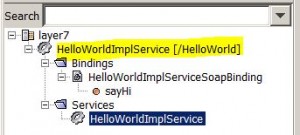
* Service should show up in the Service panel:
* New WSDL can now be accessed from Layer7 with URL: https://layer7:8443/HelloWorld?wsdl
Setup Internal Identity Provider (IIP)
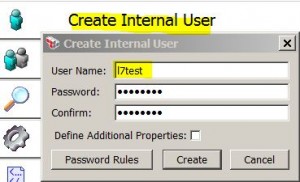
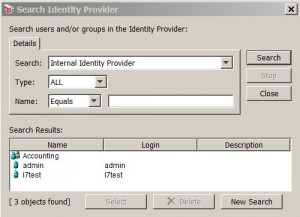
* Add a new user named l7test with password Welcome1!
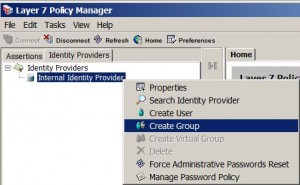
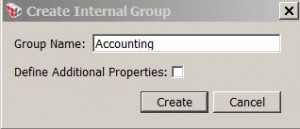
* Add a new group named Accounting
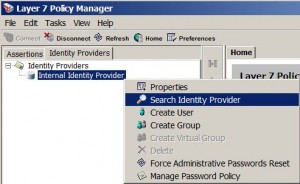
* Query internal identity provider:
Authenticate a Message against IIP
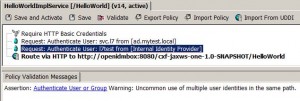
* Double click the service, e.g. HelloWorldImplService, to open the service policy panel:
* Authenticate against any user from IIP:
– Drag and drop Assertions > Access Control > Authenticate Against Identity Provider to policy panel
* Authenticate against a specific user or group from IIP:
– Drag and drop Assertions > Access Control > Authenticate User or Group to policy panel
* Authenticate against multiple users or groups from IIP:
– Drag and drop additional Assertions > Access Control > Authenticate User or Group to policy panel
Create an AD Identity Provider
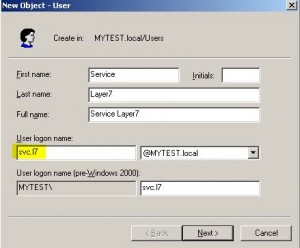
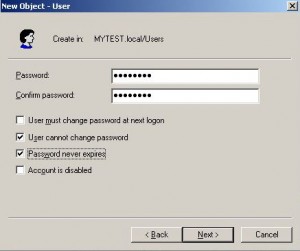
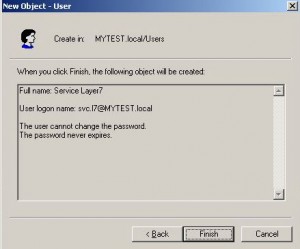
* Create a service account on AD with user name svc.l7 and password Welcome1!
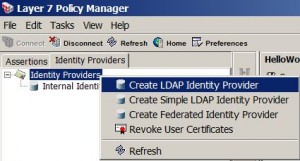
* Right click Identity Provider and then select Create LDAP Identity Provider
* Select Provider Type: MicrosoftActiveDirectory and enter login info:
* Click Test button to validate connection.
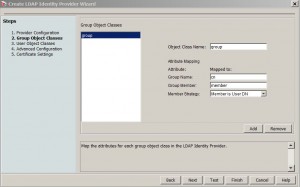
* Accept default Group Object Classes screen and click Next
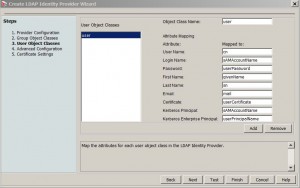
* Accept default User Object Classes screen and click Next
* Accept default Advanced Configuration screen and click Next
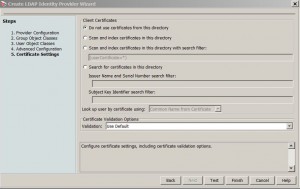
* Accept default Certificate Settings screen and click Next
* Click Finish
Require SSL Connection
* Double click service to open policy panel.
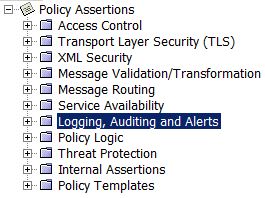
* Drag and drop Assertions > Transport Layer Security (TLS) > Require SSL or TLS Transport into policy panel.
* Click Save and Activate.
* From SoapUI, check that request to http://layer7:8080/HelloWorld endpoint is not longer working.
* From SoapUI, check that request to https://layer7:8443/HelloWorld endpoint is still working.
Add HTTP Basic Auth
* Double click service to open policy panel.
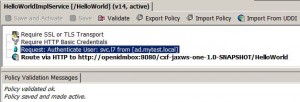
* Drag and drop Assertions > Access Control > Require HTTP Basic Credentials into policy panel and immediately under Require SSL or TLS Transport.
* Drag and drop Assertions > Access Control > Authenticate User or Group into policy panel and immediately under Require HTTP Basic Credentials.
* Select ad.mytest.local > Service Layer7
* Right click Authenticate User: svc.l7 from [ad.mytest.local] and select Target Message. Select Request and click OK button.
* Click Save and Activate.
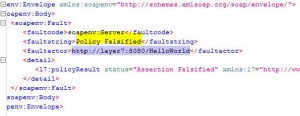
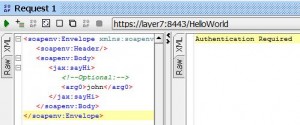
* From SoapUI, check that request to https://layer7:8443/HelloWorld endpoint now requires authentication.
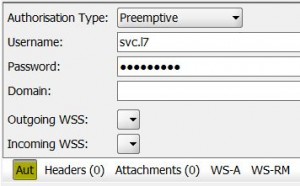
* Add to SoapUI request:
– Authorisation Type: Preemptive
– Username: svc.l7
– Password: Welcome1!
* Check that request is successful with correct username and password.
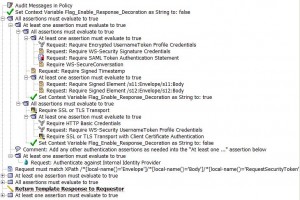
SecureSpan Policy Language
Policy Types
* Constraint assertions:
– Require SSL
– Require credentials
– Require signatures/encryption
* Action assertions
– Authenticate credentials
– Transforming messages
– Turn on auditing
– Routing messages
Policy Editing Actions
* Add an assertion: drag and drop or click add policy button (]>[)
* Rearrange an assertion: drag and drop or click up and down arrows
* Disable an assertion: click red X inside a circle button
* Delete an assertion: click the black X button
* Expand assertion: click the expand button (up arrow on top of bottom arrow)
* Copy and paste an assertion: Ctr-C/Ctr-V
* Open configurable properties: double click an assertion or right click and select … Properties
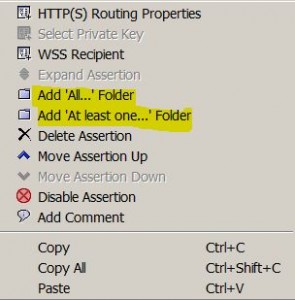
* Add ‘All…’ Folder: right click and select it
* Add ‘At least one…’ Folder: right click an select it
References
* Layer 7 Policy Manager User Manual Version 6.2





















i wanna this program layer 7 policy
Hello i need Layer 7 captcha limit (it attack by layer 7 ..this attack make that no one can connect to database captcas …only attacker he reach to it and hidden chaptcha vote from DB)
Fascinating blog! Is your theme custom made or did you download it from somewhere?
A theme like yours with a few simple adjustements would really make my blog shine.
Please let me know where you got your design. Thanks a lot
Hi Juniper,
Is there any custom made policy/service by which we can get the connection time out , readtimeout ,routing url etc of any exist service on the server.
Thanks!
Prashant Srivastava
Layer 7 is like an onion, as you keep unraveling each layer, you start to cry. If you’re used to onions, sure you’ll not cry but for most of us, Layer 7 is just another onion.
Hi,
I’m looking for training or support in Layer 7 policy manager.
Could you please respond to my message