Contents
Linux Box Info
# uname -m
x86_64

# uname -r
2.6.32-276.el6.x86_64

# cat /proc/version
Linux version 2.6.32-276.el6.x86_64 (mockbuild@x86-012.build.bos.redhat.com) (gcc version 4.4.6 20120305 (Red Hat 4.4.6-4) (GCC) ) #1 SMP Tue May 29 17:38:19 EDT 2012

# grep MemTotal /proc/meminfo
MemTotal:       35127936 kB

# cat /etc/redhat-release
Red Hat Enterprise Linux Server release 6.3 (Santiago)

# free
             total       used       free     shared    buffers     cached
Mem:      35127936    4363596   30764340          0     107384    3662592
-/+ buffers/cache:     593620   34534316
Swap:            0          0          0

# df -h /dev/shm
Filesystem            Size  Used Avail Use% Mounted on
none                   17G     0   17G   0% /dev/shm
Install Dependencies
X11 Dependencies
yum install xorg-x11-xauth.x86_64 xorg-x11-server-utils.x86_64Library Dependencies
yum install binutils-* compat-libcap* compat-libstdc++-* compat-libstdc++-* gcc-* gcc-c++-* glibc-* glibc-* glibc-devel-* glibc-devel-* ksh libgcc-* libgcc-* libstdc++-* libstdc++-* libstdc++-devel-* libstdc++-devel-* libaio-* libaio-* libaio-devel-* libaio-devel-* make-* sysstat-*
Prepare Swap File
* Prepare swap if needed:
# Remote swap file if installed
swapoff /swapfile
rm /swapfile

# Add 6 GB swap space. 1024 * 6000 = 6144000
dd if=/dev/zero of=/swapfile bs=1024 count=6144000
/sbin/mkswap /swapfile
/sbin/swapon /swapfile
/sbin/swapon -s

# Add to <em>/etc/fstab</em>:
/swapfile swap swap defaults 0 0

# Check new swap
free -m
grep SwapTotal /proc/meminfo
Setup Kernel Parameters
Check Kernel Parameters
* Create a shell script checkkm.sh with content:
#!/bin/sh
/sbin/sysctl -a | grep sem
/sbin/sysctl -a | grep shm
/sbin/sysctl -a | grep file-max
/sbin/sysctl -a | grep ip_local_port_range
/sbin/sysctl -a | grep rmem_default
/sbin/sysctl -a | grep rmem_max
/sbin/sysctl -a | grep wmem_default
/sbin/sysctl -a | grep wmem_max
* Run it to get current kernel parameters:
chmod u+x checkkm.sh
./checkkm.sh

kernel.sem = 250        32000   32      128
kernel.shmmax = 68719476736
kernel.shmall = 4294967296
kernel.shmmni = 4096
kernel.shm_rmid_forced = 0
vm.hugetlb_shm_group = 0
fs.file-max = 3465274
net.ipv4.ip_local_port_range = 32768    61000
net.core.rmem_default = 229376
net.core.rmem_max = 131071
net.core.wmem_default = 229376
net.core.wmem_max = 131071
Configure New Kernel Parameters
* Adjust kernel parameters by adding to /etc/sysctl.conf:
kernel.sem = 250 32000 100 128
fs.aio-max-nr = 1048576
fs.file-max = 6815744
net.ipv4.ip_local_port_range = 9000 65500
net.core.rmem_default = 262144
net.core.rmem_max = 4194304
net.core.wmem_default = 262144
net.core.wmem_max = 1048576
* Restart box
shutdown -r nowSetup Oracle User and Groups
Create OS Groups and Users
groupadd -g 500 oinstall
groupadd -g 501 dba
useradd -u 500 -g oinstall -G dba -d /home/oracle oracle -s /bin/bash

# Set oracle password (mycom1)
passwd oracle
Check oracle User Limits
* Create a new shell script named oralimits.sh:
#!/bin/sh

echo ulimit -Sn
ulimit -Sn

echo ulimit -Hn
ulimit -Hn

echo ulimit -Su
ulimit -Su

echo ulimit -Hu
ulimit -Hu

echo ulimit -Ss
ulimit -Ss

echo ulimit -Hs
ulimit -Hs
* Run it to get current user limits:
chmod u+x oralimits.sh
./oralimits.sh

ulimit -Sn
1024
ulimit -Hn
4096
ulimit -Su
1024
ulimit -Hu
274060
ulimit -Ss
10240
ulimit -Hs
unlimited
Adjust User Limits
* Adjust user limits by adding to /etc/security/limits.conf:
oracle              soft    nproc   2047
oracle              hard    nproc   16384
oracle              soft    nofile  1024
oracle              hard    nofile  65536
oracle              soft    stack   10240
Create Directory Structure
mkdir -p /u01/app/
chown -R oracle:oinstall /u01/app/
chmod -R 775 /u01/app/
Setup oracle User Env
* Add to oracle user ~/.bashrc file:
export ORACLE_BASE=/u01/app/oracle
export ORACLE_SID=orcl
Install Oracle
* Download Oracle 11gR2 for Linux x86-64 from Oracle download site.
* Unzip both zip files to the same directory:
unzip linux.x64_11gR2_database_1of2.zip
unzip linux.x64_11gR2_database_2of2.zip
* Start installer
cd database
./runInstaller
Screens
* Uncheck I wish to receive security updates via My Oracle Support.
* Click Yes on Email not specified warning.
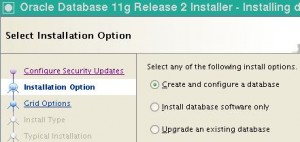
* Select Create and configure database.
* Select Server class.
* Select Single instance database.
* Select Advanced install.
* Select English
* Select Enterprise Edition
* Accept Oracle base: /u01/app/oracle
* Accept Oracle home: /u01/app/oracle/product/11.2.0/dbhome_1
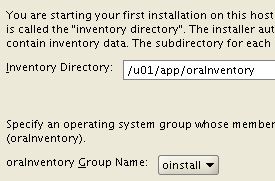
* Accept Inventory directory: /u01/app/oraInventory
* Select General purpose / Transaction processing
* Enter Global database name: orcl.mycom.com
* Select SID: orcl
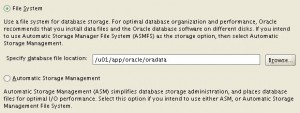
* Select File System, not Enable Automatic Memory Management
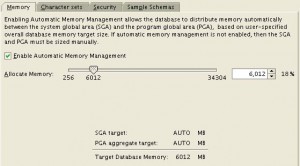
* Memory setting:
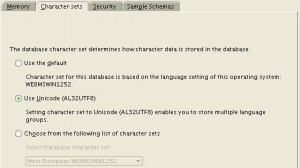
* Character set:
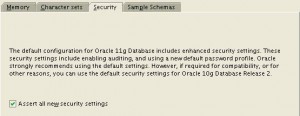
* Security setting:
* Check Create database with sample schemas
* Select Use Database Control for database management
* Accept default data file directory.
* Select Do not enable automatic backups.
* Select Use same password for all accounts: mycom1
* Accept default groups.
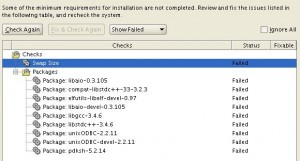
* You may see check failed:
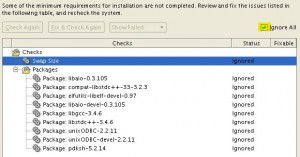
* Ignore check fails:
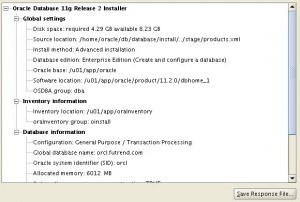
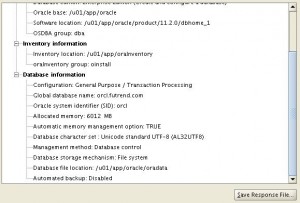
* Summary:
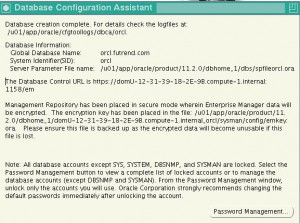
* Unlock user if needed:
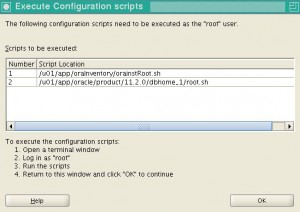
* Run two shell scrips as root user:
Update Env Variables
export ORACLE_BASE=/u01/app/oracle
export ORACLE_SID=orcl
export ORACLE_HOME=$ORACLE_BASE/product/11.2.0/dbhome_1
export PATH=$ORACLE_HOME/bin:$PATH
Check Install
* Start database:
sqlplus / as sysdba
startup
* Start listener:
lsnrctl
start
* Use sqlplus:
sqlplus / as sysdba

sqlplus scott/tiger
EM Console
* Start EM Console:
emctl start dbconsole
* EM Console cannot be access outside of EC2.
* EM Console URL:
https://www.my.com:1158/em/console
* See this post on how to reconfigure EM
Setup Auto Start
Login as oracle user
* Create /home/oracle/scripts directory to hold startup scripts:
mkdir -p /home/oracle/scripts
* Create startup.sh
cd /home/oracle/scripts
vi startup.sh
#!/bin/bash

# Oracle SID value needs to match in /etc/oratab and is case sensitive
export ORACLE_SID=orcl
ORAENV_ASK=NO
. oraenv
ORAENV_ASK=YES

# Start Listener
lsnrctl start

# Start Database
sqlplus / as sysdba << EOF
STARTUP;
EXIT;
EOF

# Start EM
emctl start dbconsole
* Create shutdown.sh
vi shutdown.sh
#!/bin/bash

# Oracle SID value needs to match in /etc/oratab and is case sensitive
export ORACLE_SID=orcl
ORAENV_ASK=NO
. oraenv
ORAENV_ASK=YES

# Stop EM
emctl stop dbconsole

# Stop Database
sqlplus / as sysdba << EOF
SHUTDOWN IMMEDIATE;
EXIT;
EOF

# Stop Listener
lsnrctl stop
* Set permissions:
chmod u+x /home/oracle/scripts/startup.sh /home/oracle/scripts/shutdown.sh
Login as root User
* sudo to root user
su -* Turn on orcl in /etc/oratab file.
orcl:/u01/app/oracle/product/11.2.0/dbhome_1:Y
* Create /etc/init.d/dbora
vi /etc/init.d/dbora
#!/bin/sh
# chkconfig: 345 99 10
# description: Oracle auto start-stop script.
#

ORA_OWNER=oracle

case "$1" in
    'start')
        # Start the Oracle databases:
        # The following command assumes that the oracle login
        # will not prompt the user for any values
        su - $ORA_OWNER -c "/home/oracle/scripts/startup.sh >> /home/oracle/scripts/startup_shutdown.log 2>&1"
        touch /var/lock/subsys/dbora
        ;;
    'stop')
        # Stop the Oracle databases:
        # The following command assumes that the oracle login
        # will not prompt the user for any values
        su - $ORA_OWNER -c "/home/oracle/scripts/shutdown.sh >> /home/oracle/scripts/startup_shutdown.log 2>&1"
        rm -f /var/lock/subsys/dbora
        ;;
esac
* Set file permission:
chmod 750 /etc/init.d/dbora
* Add service with chkconfig command:
chkconfig --add dboraTest
* Test dbora script:
service dbora stop
service dbora start
* Reboot to test
* See this article for more details.
Uninstall
cd /opt/app/oracle/product/11.2.0/dbhome_1/deinstall
./deinstall

# Accept all defaults
Silent Mode
* Save a response file, e.g. db.rsp, from previous install
* Run installer in silent mode and point to response file:
./runInstaller -silent -responseFile ~/db.rsp
* Login as root and execute the following commands to finish the install:
#!/bin/sh
#Root scripts to run

/u01/app/oraInventory/orainstRoot.sh
/u01/app/oracle/product/11.2.0/dbhome_1/root.sh
Issues
cannot restore segment prot after reloc: Permission denied
* Cause: SELinux is turned on
* Possible solution: set SELinix to permissive mode
– Temporarily:
#setenforce 0
– Permanently:
vi /etc/sysconfig/selinux
SELINUX=permissiveReferences
* Quick Installation Guide 11g Release 2 (11.2) for Linux x86-64
* Oracle Database 11g Release 2 (11.2) Document Library
* Oracle Database Download Site

