Contents
Create Default WebCenter Portal Application
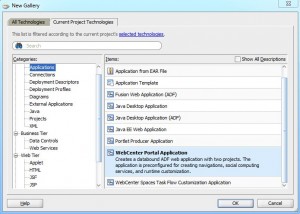
* Select File > New > General > Applications
* Select WebCenter Portal Application:
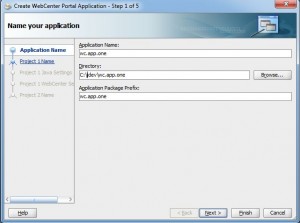
* Enter application name, e.g. wc.app.one:
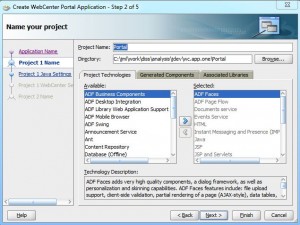
* Enter project name, defaults to Portal:
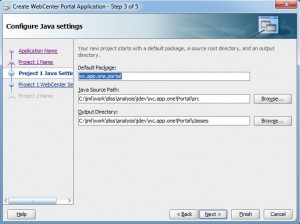
* Accept default Java Settings:
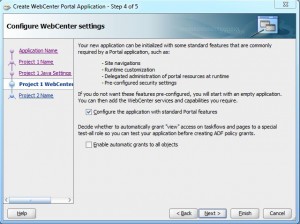
* Check Configure the application with standard Portal features
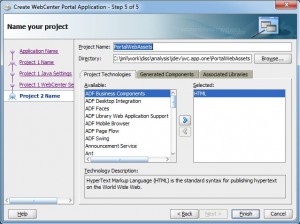
* Enter the name for the web application project to be used for static resources (defaults to PortalWebAssets):
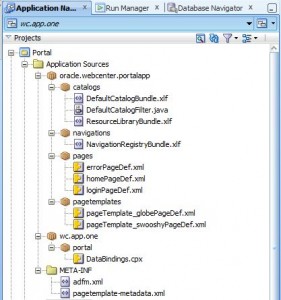
Default Portal: Application Sources
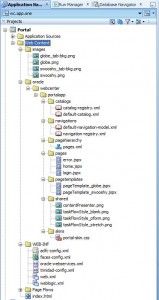
Default Portal: Web Content
WebCenter Admin Console
* Right click index.html and select Run
* Login portal with default login weblogic/weblogic1
* Click Administration link on the top right of the page
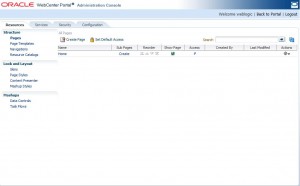
Manage Pages
* All page changes are saved in MDS database
* Click Reset Page to remove all page changes
Create Page
* Go to Admin Console > Resources > Structure > Pages
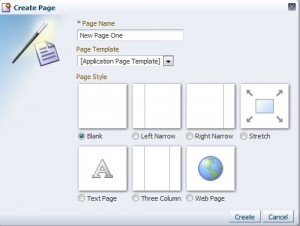
* Click Create Page to bring up Create Page wizard
* Enter:
– Page Name: New Page One
– Page Template: [Application Page Template]
– Page Style: Blank
* Click Create
* Check Show Page check box will cause the page to show up on the navigation
Move Page
* Go to Admin Console > Resources > Structure > Pages
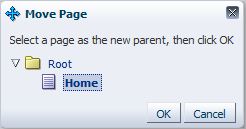
* Click Action icon and select Move Page
* Select page parent and click OK
* Click Sub Pages icon to see child pages
Secure Page
* Go to Admin Console > Resources > Structure > Pages
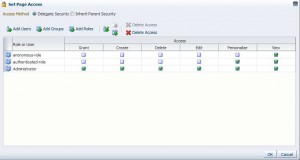
* Click Action icon and select Set Access
* Default to Inherit Parent Security
* Click Delegate Security
* Set page access as needed
* Click OK when done
Create New Page Template
* Right click pagetemplates folder (Portal > Web Content > oracle > webcenter > portalapp > pagetemplates) and select New
* Select Web Tier > JSF > JSF Page Template and click OK
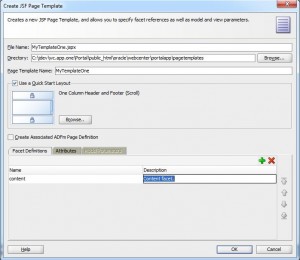
* Enter:
– File Name: MyTemplateOne.jspx
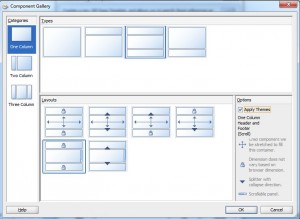
* Check Use a Quick Start Layout and click Browse…
* Select desired layout
* Check Options: Apply Themes
* Click OK
* Select Facet Definitions and click green add button
* You must add a new facet named content:
Edit Page
* Go to Admin Console > Resources > Structure > Pages
* Click Action icon and select Edit Page
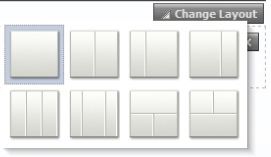
* Click Change Layout:
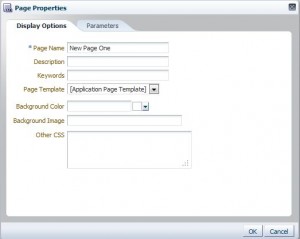
* Click Page Properties to view:
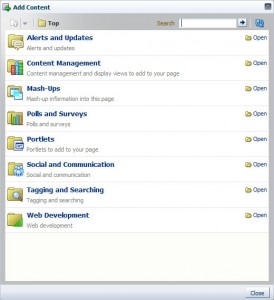
* Click Add Content:
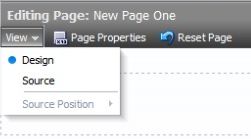
* You can view page source by clicking View > Source:
Build JSR-286 Portlets
Create Portlet Application and Project
* Select File > New > General > Applications > Portlet Producer Application and click OK
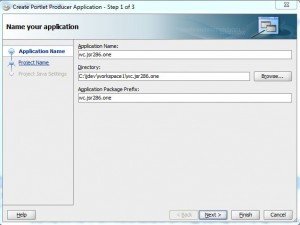
* Enter:
– Application Name, e.g. wc.jsr286.one
– Directory, e.g. jdev\workspace1\wc.jsr286.one
– Package prefix, e.g. wc.jsr286.one
* Click Finish to accept all defaults.
Create Portlet
* Select File > New > General > Web Tier > Portlets > Standard-based Java Portlet (JSR 286)
* Click OK to bring up Create JSR 286 Java Portlet wirzard
* Enter portlet:
– Name, e.g. MyPortletOne
– Class, e.g. MyPortletOne
– Package, e.g. wc.jsr286.one.portlet
– Language, e.g. English (United States)
* Click Next and enter additional portlet information
* Click Next
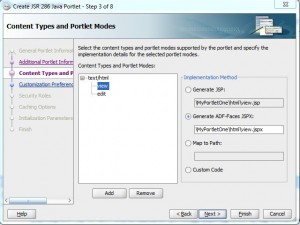
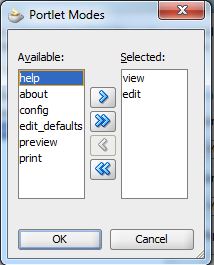
* Click each portlet mode and select Generate ADF-Faces JSPX
* Click Add button to add additional portlet modes
* Specify portlet preferences
* Click Finish to accept all other defaults
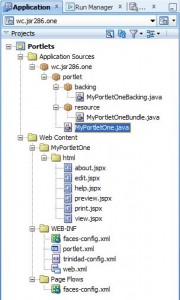
Generated Project Structure
Edit Portlet Configuration
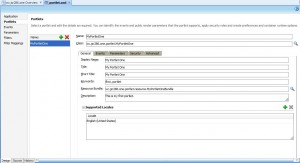
* Portlet configuration can be edited in protlet.xml file:
Consuming Portlets
* WebCenter Supports JSR-286 portlets and WSRP
* All portlets in WebCenter are remote (benefits: loose coupling and scaling)
Register JSR-286 Portlets at Design Time in JDev
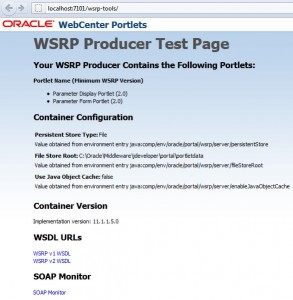
* WebCenter sample portlets page: http://localhost:7101/wsrp-tools/
* Open WebCenter Portal application, e.g. wc.app.one
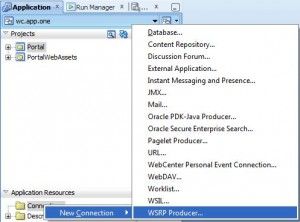
* Right click Application Resources > Connections and select WSRP Producer…
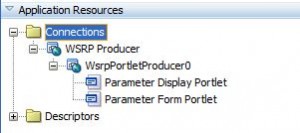
* Enter Producer Registration Name: WsrpPortletProducer0
* Enter WSDL URL: http://localhost:7101/wsrp-tools/portlets/wsrp2?WSDL
* Click Next and accept all other defaults by clicking Finish
Register JSR-286 Portlets at Run Time in Web Browser
* Login WebCenter portal, e.g. weblogic/weblogic1
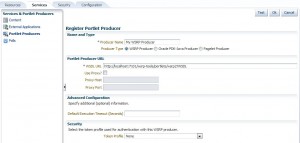
* Go to Administration > Services > Portlet Producers
* Click Register
* Enter
– Producer Name: My WSRP Producer
– WSDL URL: http://localhost:7101/wsrp-tools/portlets/wsrp2?WSDL
* Click Test button to test connection
* Click OK to register (WSDL stored in MDS)
Consuming Portlets at Design Time
* Open Web Content > oracle > webcenter > portalapp > pages > home.jspx
* Drag Application Resources > Connnections > WSRP Producer > WsrpPortletProducer0 > Parameter Form Portlet onto page Panel Customizable.
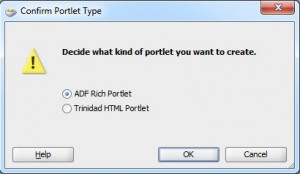
* Select ADF Rich Portlet or Trinidad HTML Portlet and click OK.
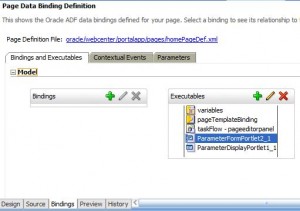
* Click the Bindings tab for the page and click Page Definition File link to view the page definition file.
Consuming Portlets at Runtime
* Go to Admin Console > Resources > Structure > Pages
* Click Action icon and select Edit Page
* Click Add Content
* Go to Portlets > WsrpPortletProducer0
* Click Add to add a portlet
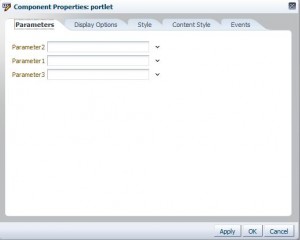
* Click the Edit icon to edit portlet properties
Wiring Two Portlets at Runtime
* Identical parameter names within different portlets are wired automatically by WebCenter. Otherwise, follow below steps to wire up two portlets.
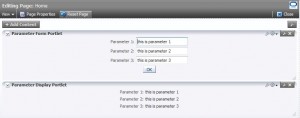
* Follow Consuming Portlets at Runtime setion to add both Parameter Form Portlet and Parameter Display Portlet to home page.
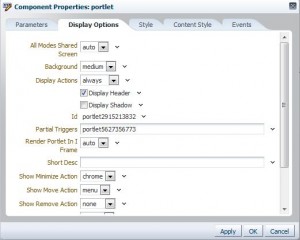
* Find Parameter Form Portlet Id (Portlet Edit Icon > Display Options > Id), e.g. portlet5627356773
* Click Parameter Display Portlet edit icon
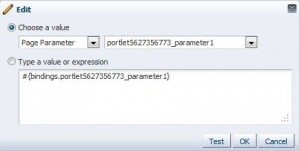
* For each parameter, click Edit Icon (down arrow that looks like a V) for the parameter and select Expression Building…
* Choose Choose a value > Page Parameter > portlet<id>_parameter1 and click OK
* Click Display Options and enter the Parameter Form Portlet id into the Partial Triggers input field, e.g. portlet5627356773
* Test wiring by enter parameter values and click OK
References
* Oracle WebCenter 11g PS3 Administration Cookbook By: Yannick Ongena;





Hi ,
am currently working with Oracle UCM webcenter content management,getting use to Core Components and Customising the Components, Need some help on how to Customise the Table Menu and page menu (Header Menu )on Search results.
Thanks
Hi,
I wanted some basic idea for i18n and responsive design while we use remote portlets.
I18n shouldn’t be an issue and we may face issue while responsive as the webcenter portal renders the remote portlet in an iframe. Please share your inputs.
Thanks