Contents
Overview
* Distributed authentication app is used,e.g. in DMZ, to proxy to OpenAM server
Install Distributed Authentication Server
* Create DNS name by adding to hosts file
127.0.0.1 dmz.my.com
* Install Tomcat:
– Unzip apache-tomcat-7.0.72.zip and rename as c:\prog\apache-tomcat-7.0.72.dmz
– Change listening ports from 8xxx to 11xxx, e.g. 8080 to 11080 in conf\server.xml file
8005 > 11005
8080 > 11080
8443 > 11443
8009 > 11009
– Add setenv.bat to bin directory to contain:
set JAVA_OPTS=-Dfile.encoding=UTF-8 -Xms128m -Xmx1024m -XX:PermSize=64m -XX:MaxPermSize=256m
set JAVA_HOME=C:\prog\jdk1.7.0_45
– Start new Tomcat and point browser to: http://dmz.my.com:11080/docs
* Deploy distributed authentication application
– Extract OpenAM-DistAuth-12.0.0.war from OpenAM-12.0.0.zip
– Move it to C:\prog\apache-tomcat-7.0.72.dmz\webapps
– Rename it to openam-distauth.war
Prepare OpenAM for Distributed Authentication
Prepare Cookie Domains
* Login OpenAM
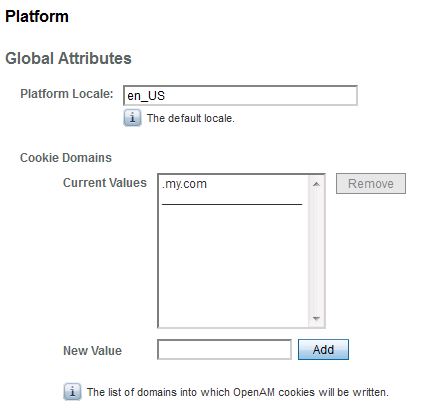
* Go to: Configuration > System > Platform
* Add domains for the distributed authentication server to cookie domains if it is different from OpenAM. In this case, both are my.com so no need to add:
Prepare Realm/DNS Aliases
* Login OpenAM
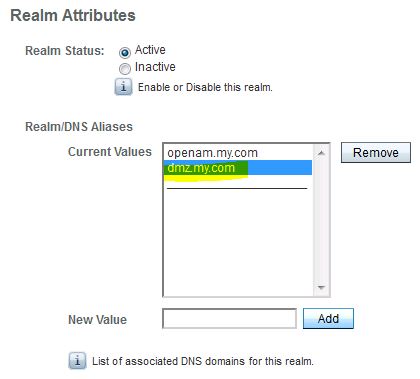
* Go to: Access Control > Top Realm > General
* Add DNS name, i.e. dmz.my.com, for the distributed authentication server:
Configure Distributed Authentication Application
* Start Tomcat and point browser to http://dmz.my.com:11080/openam-distauth/distAuthConfigurator.jsp
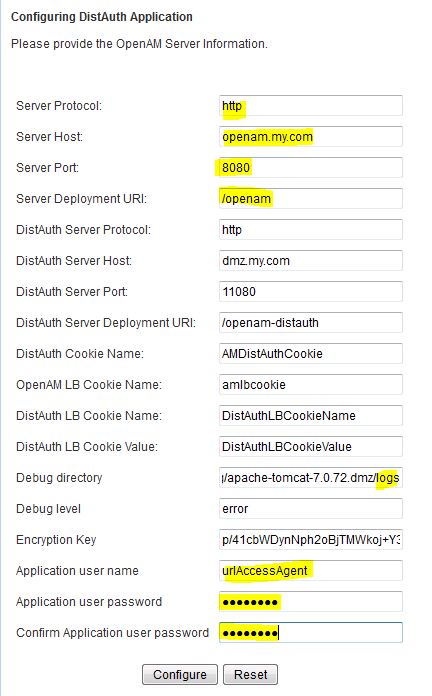
* Enter values on the config page:
– Use UrlAccessAgent as application user name. It is setup during initial OpenAM setup.
* Configuration is saved in C:\Users\me\FAMDistAuth\_prog_apache-tomcat-7.0.72.dmz_webapps_openam-distauth_AMDistAuthConfig.properties
Test
* Use URL format: PROTOCOL://DISTAUTH:PORT/DEPLOYMENT-URI/UI/Login?goto=PROTECTEDCONTENT
* For example, point browser to:
http://dmz.my.com:11080/openam-distauth/UI/Login?goto=http://tomcat6.my.com:10080/docs
* Enter OpenAM username and password to login


