
Contents
Dell R900
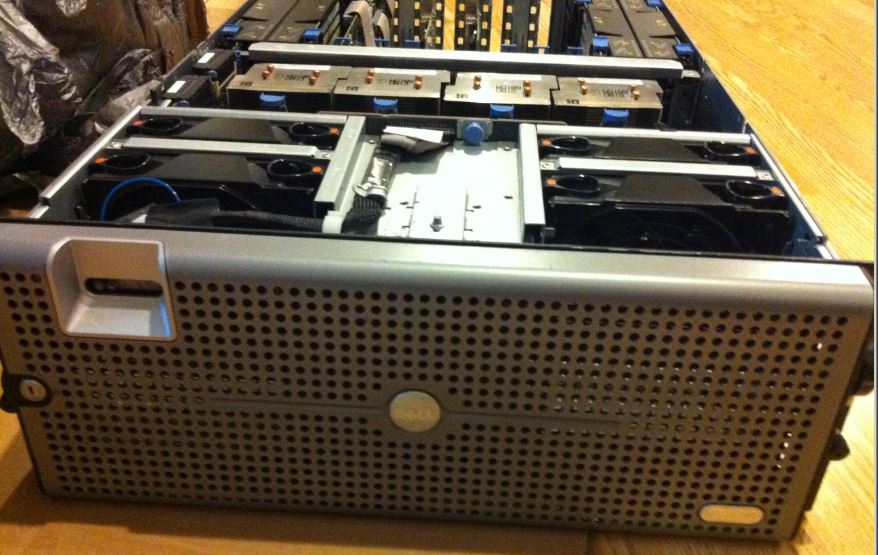
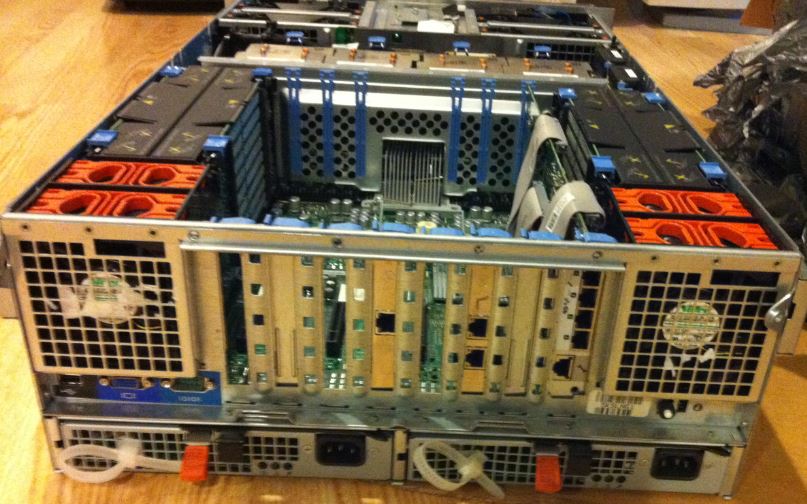
Server Spec
Server Type 	4U Rackmount
Model 	PowerEdge R900
Processors 	(4) Four Core 2.6GHz Intel Xeon X7460 16MB Cache
Memory / RAM 	64GB RAM; Max 256GB in 32 slots
Storage / HDD 	Five (5) 300GB 15k SAS Hard Drives
HDD Form Factor 	3.5 HDD (Supports 5 Total)
RAID 	PERC 6i RAID Controller With Battery Backup (RAID 0-10)
Remote Access 	DRAC 5 Remote Access Controller
Networking 	Integrated Quad Port NIC + (2) Dual Port NICs - 8-Ports Total
Expansion 	Six (6) available  PCI-e Slots (Three PCI-e x4, Three PCI-e x8)
Graphics 	Integrated video - VGA port
CD / DVD 	DVD-ROM Included
Operating System 	None Included; Supports Windows Server, Linux, ESXi, and more
Bezel / Faceplate 	Locking Bezel / Faceplate Included
Power Supply 	Dual Redundant 1030W Power Supply and Cords Included
Rackmount Rails 	Not Included
Warranty 	1-Year Warranty
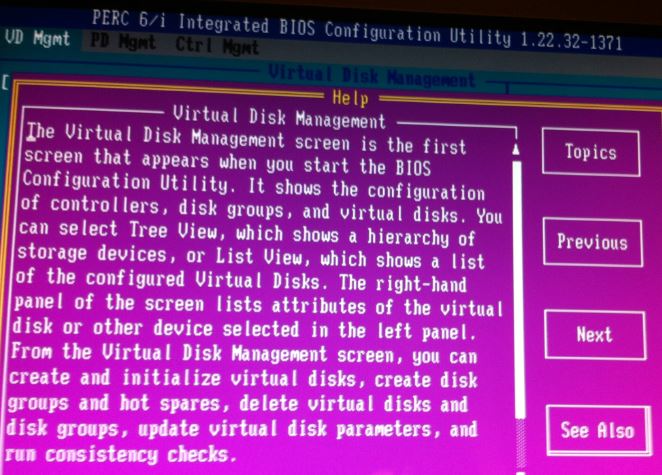
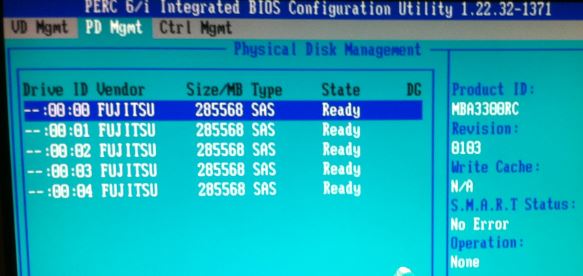
Configure PERC 6/i RAID Virtual Disk
* Boot up system
* When prompted, press Ctrl R to run RAID configuration utility:

* On PERC 6/i Integrated BIOS Configuration Utility screen, press F2:

* PERC 6/i help menu:
* PD Management menu:
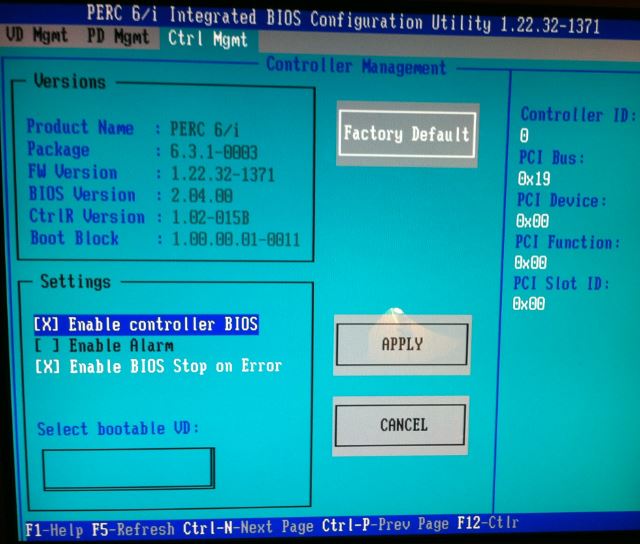
* Control Management menu:
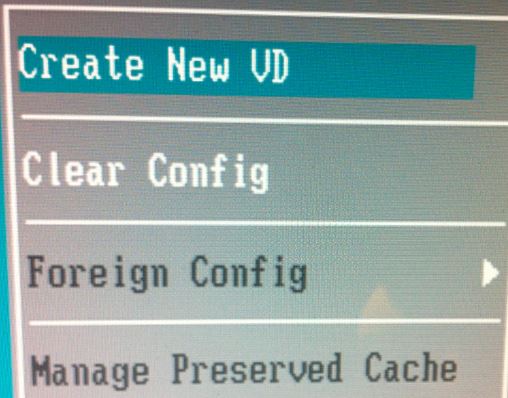
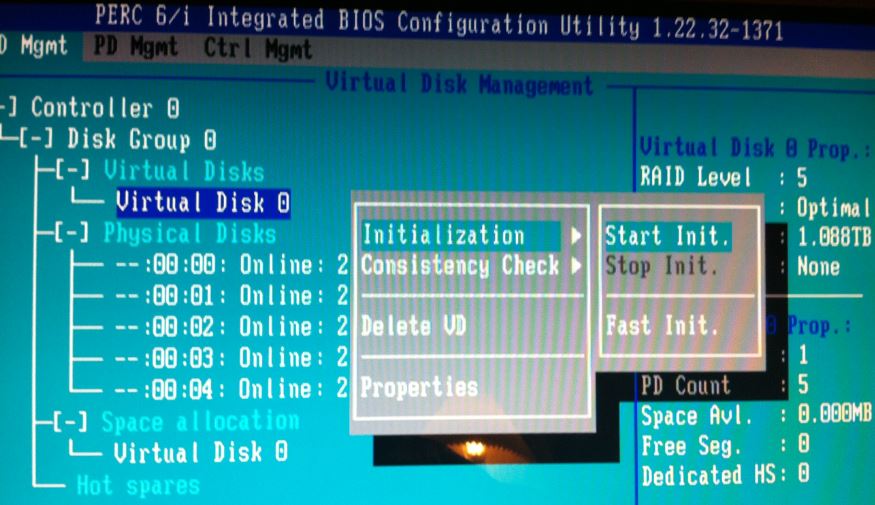
* Select Create New VD:
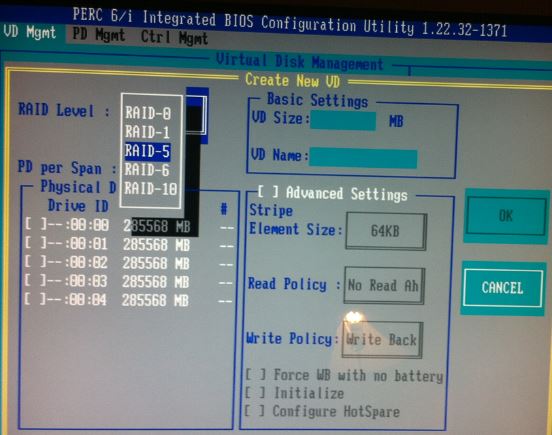
* Select RAID-5
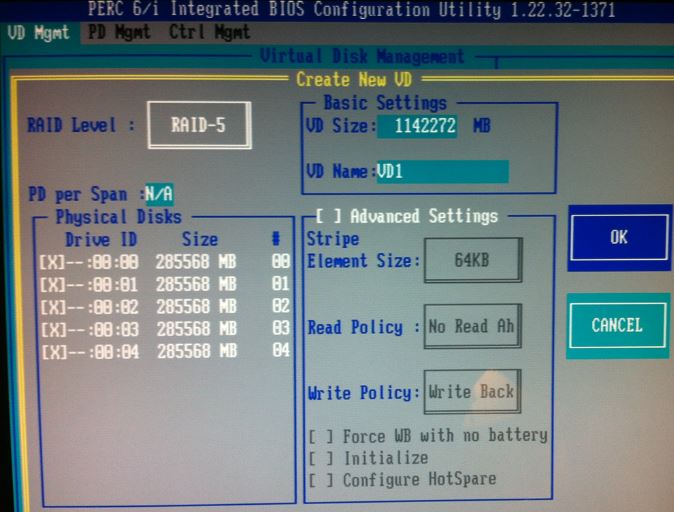
* VD Name: VD1
* Initialize new virtual disk:
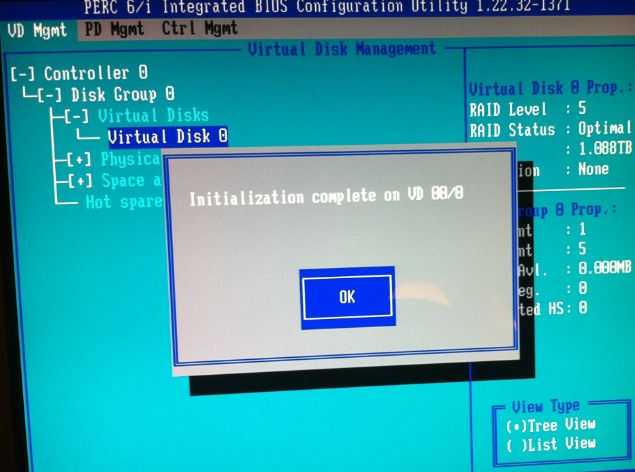
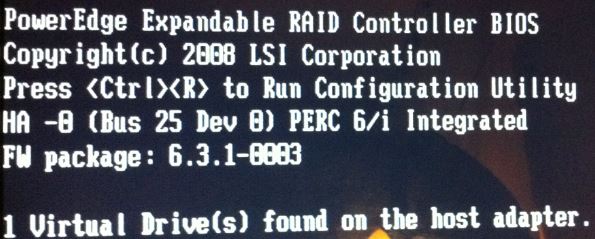
* New boot up message:
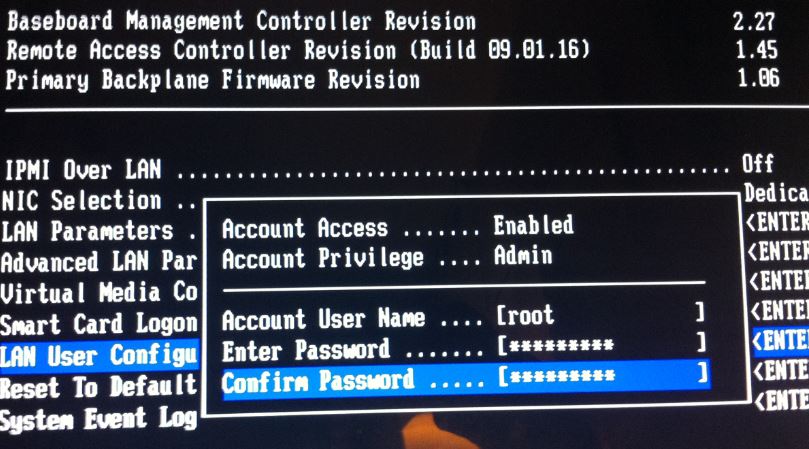
Configure DRAC
* When system boots up, at Remote Access Configuration Utility prompt, press Ctrl-E to enter DRAC configuration
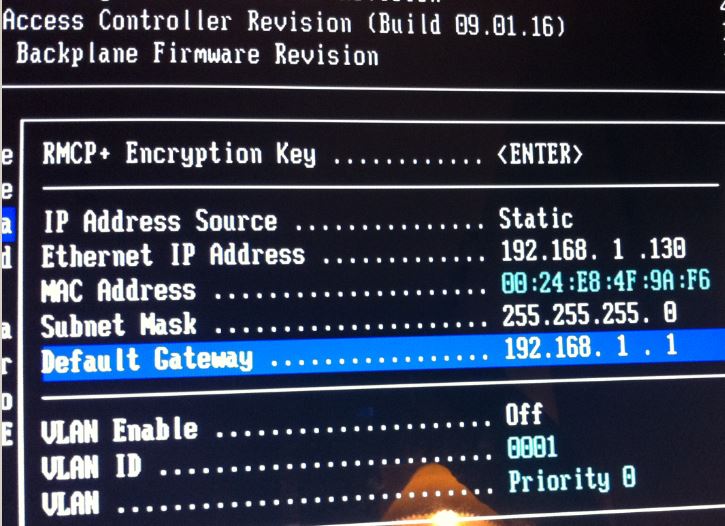
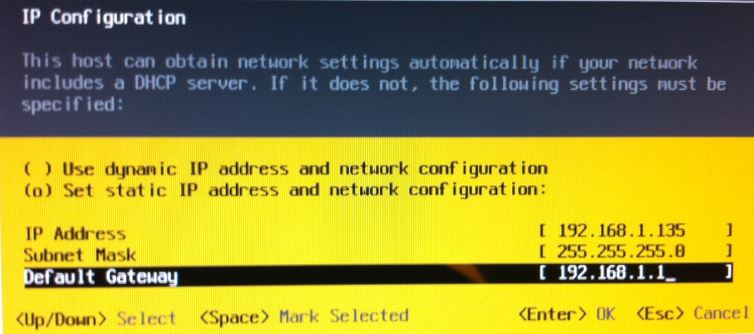
* Select to configure LAN parameters:

* Configure DRAC IP address:
* Setup admin user:
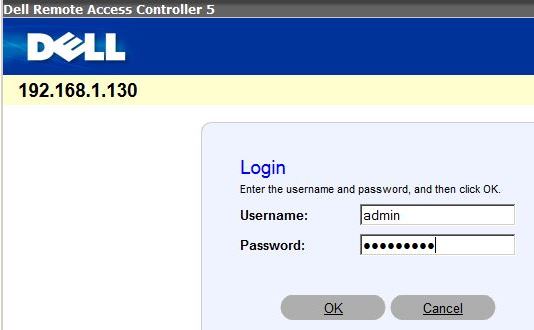
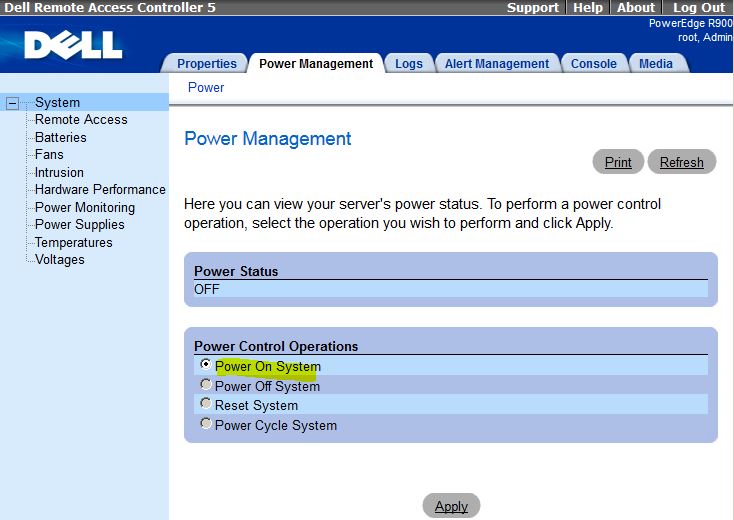
Power on Machine from DRAC
* Login DRAC as admin:
* Power on machine:
Install ESXi 5.5
Download
* Download VMware vSphere Hypervisor (ESXi) 5.5
* License Info:
VMware vSphere Hypervisor 5 License xxxxxxxxxxxxxx
* Download
ESXi 5.5 Update 1 ISO image (Includes VMware Tools)
2014-03-11 | 5.5.0 U1 | 328 MB | iso
* Burn ISO to CD ROM
Install ESXi 5.5
* Boot from ESXi 5.5 CD ROM
* See this post on how to install ESX 5
* IP config:
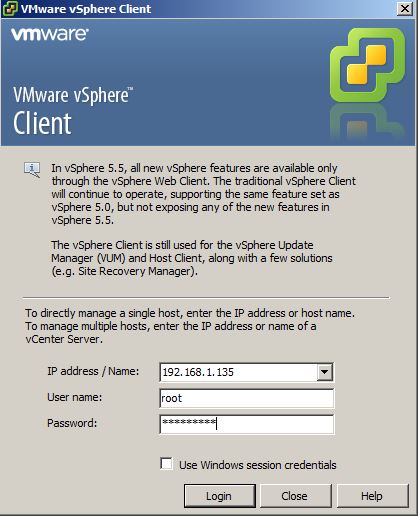
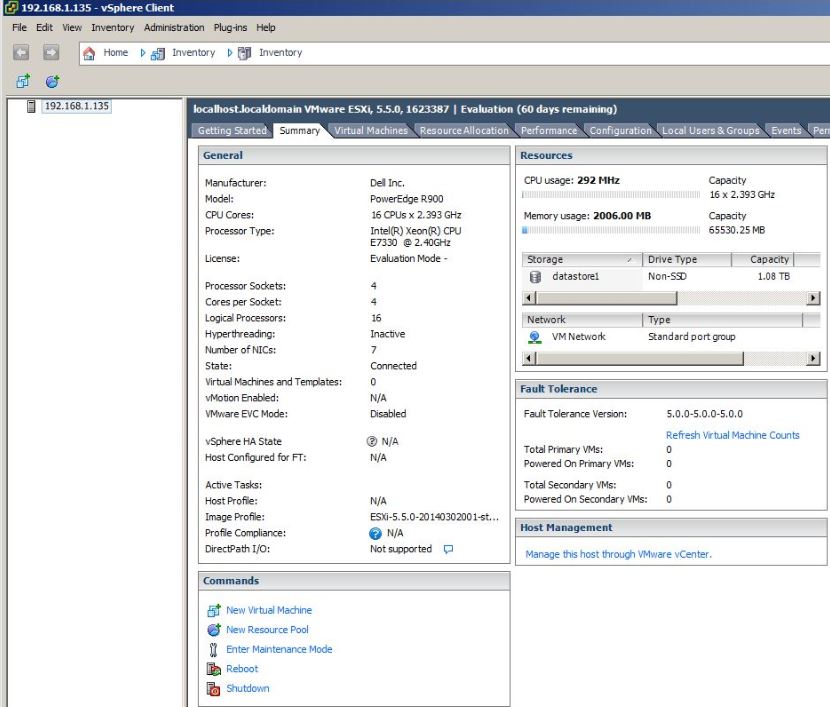
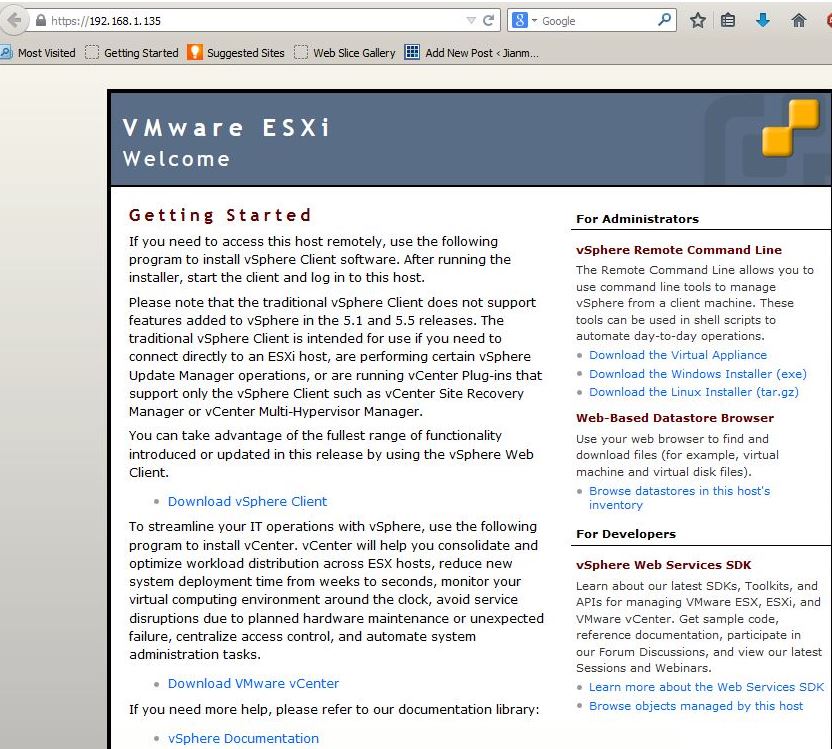
Access ESX 5.5
* From vSphere Client:
* From Web Console
Replace Hard Drive
* Middle drive has ember indicator light blinking so it is time to replace it
* Replacement Drive: Fujitsu CA06778-B400 Fujitsu 300GB 15K 3Gbps SAS Hard Drive RoHS Compliant MBA3300RC (CA06778B400)
* Login OMSA found that disk is already in fail state
* Since disk is already bad, no need to take it offline (already offline)
* Take out drive
* Replace drive
* Insert new drive. It took a while to rebuild
* Check ember indicator not longer shown
* Check from OMSA that new disk has been rebuilt and functional
Replace Noisy Fans
* Reference: How to Make a Dell PowerEdge Quieter
Original Fan
* Original Fan is 12mm Nidec Model V34809-35DELF.
* Here is the spec page.
– Air flow rate is 220 CFM
* It has 4 wires:
– Black: Ground
– Red: 12V
– Yellow: Sense
– Blue: Control
Replacement Fan
* Replacement fan is 12mm ARCTIC F12 PWM PST – Standard Low Noise PWM Controlled Case Fan with PST Feature.
* Air flow rate is 74 CFM (too low!)
*It has 4 wires:
– Black: Ground (connect to old black)
– Yellow: 12V (connect to old red!)
– Green: Sense (connect to old yellow)
– Blue: Control (connect to old blue)