Contents
Env
* SSH Secure Shell 3.2.9 (Build 283) from SSH Communications Security Corp
* CentOS 5.6
Generate Private Key
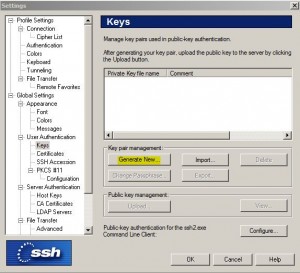
* Open SSH Secure Shell client
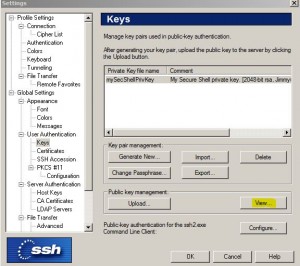
* Select Edit > Settings > Global Settings > User Authentication > Keys
* Click Generate New button
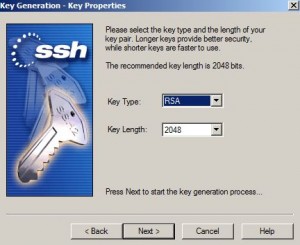
* Select:
– Key Type RSA
– Key Length: 2048
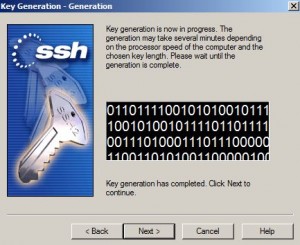
* Click Next when key generation process has completed
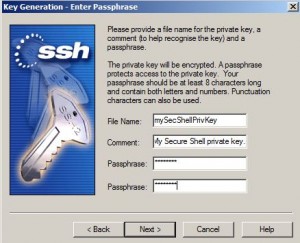
* Enter file name and passphrase
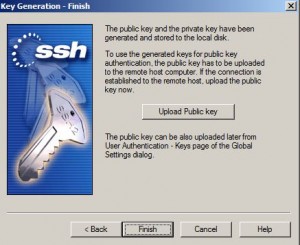
* Click Finish
Setup Public Key in CentOS
Copy Public Key
* From SSH Secure Shell client
* Select Edit > Settings > Global Settings > User Authentication > Keys
* Click Public key management > View…
* Copy the public key text string
Setup Public Key in CentOS
* Login CentOS
* Create .ssh directory if it does not already exist
* Change to .ssh directory
mkdir ~/.ssh
chmod 700 ~/.ssh
cd ~/.ssh
* Upload public key to .ssh directory
– Or you can create a file, named e.g. ssh2_key.pub, and cut and paste the public key string onto the the file
* Convert SSH2 key to OpenSSH key format and append to authorized_keys2 file.
* Also chmod to 600 for the file:
ssh-keygen -i -f ~/.ssh/ssh2_key.pub >> ~/.ssh/authorized_keys2
chmod 600 ~/.ssh/authorized_keys2

