Contents
- Environment
- Prepare DB
- Create ADF Web App
- Create JSF Web pages
- Binding Data Controls to your JSF page
- Enhancing your JSF page
- Adding More Complex Business Services
- Creating a Page Flow
- Using ADF Faces Framework Features
- Create Read Only Business Services, Page Fragments and Regions
- Using Skins
- References
Environment
* JDeveloper 11gR2
* Oracle Database 10.2
Prepare DB
* Unlock Oracle DB HR user:
ALTER USER HR IDENTIFIED BY HR account UNLOCK;
Create ADF Web App
Create New App
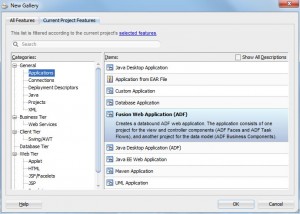
* Select File > New… > General > Applications > Fusion Web Application (ADF).
– Click OK.
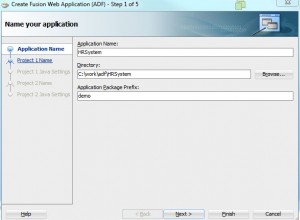
* On Name your application screen, enter:
– Application Name: HRSystem
– Directory: C:\jml\work\11g\adf\HRSystem
– Application package prefix: demo
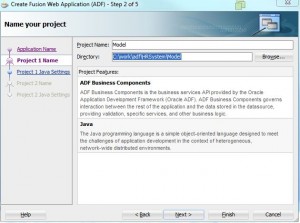
* On name your project screen, enter:
– Project Name: Model
– Directory: C:\work\adf\HRSystem\Model
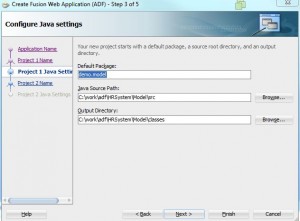
* On Configure Java settings screen, accept all defaults:
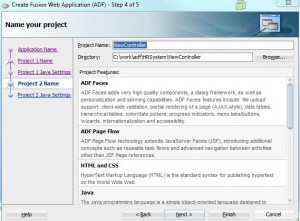
* On Name your project screen for project 2, accept all defaults:
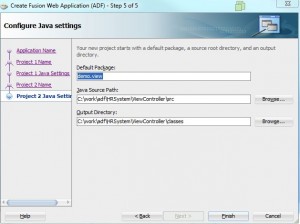
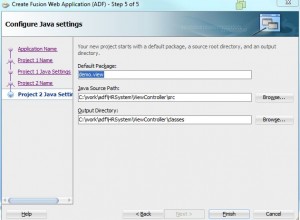
* On Configure Java settings screen for project 2, accept all defaults:
* Click Finish
* Two projects are created for the application:
– Model
– ViewController
Create a DB Connection
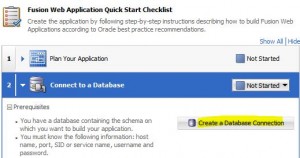
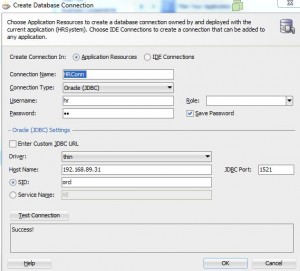
* On HRSystem Checklist, click Connect to a Database -> Create a Database Connection.
* Enter
– Connection Name: HRConn
– Username: hr
– Password: hr
* Click ‘Test Connection‘ button and should get a Success! response
* Click OK.
* Mark Connect to a Database step as Done by select Done from the drop down list (under Not Started).
Build Business Services
* On Checklist, click Build Business Services.
* Click Go to Substeps.
* Click 3.1 Create Entity Objects and Associations
* Click Create Entity Objects and Associations button.
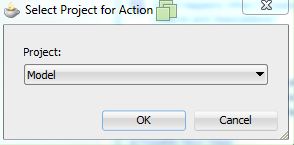
* On Select Project for Action dialog, select Model from drop down list. Click OK.
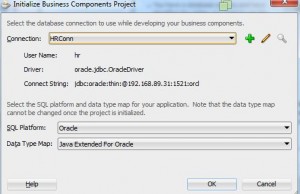
* On the Initialize Business Components Project dialog, select
– Connection: HRConn
– Data Type Map: Java Extended for Oracle
* Click OK.
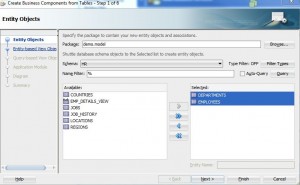
* On Entity Objects dialog,
– click Query button (Available tables show up).
– Move available tables to Selected pane:
DEPARTMENTS
EMPLOYEES
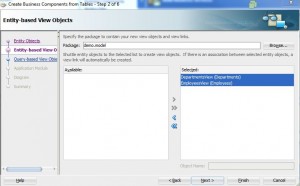
* On Entity-based View Object screen, move available tables to Selected pane:
DEPARTMENTS
EMPLOYEES
* On Updatable View Objects dialog,
– Move both tables from Available pane to Selected pane.
– Click Next.
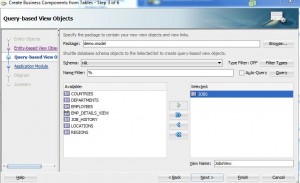
* On Query-based View Objects dialog,
– Click Query button.
– Move from Available to Selected pane:
JOBS
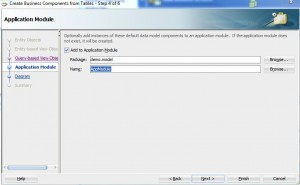
* On Application Module dialog, click Finish.
* Mark 3.1 Create Entity Objects and Associations step as Done.
* Click Close Step 3 button and mark Build Business Services step as Done.
Test Application Module
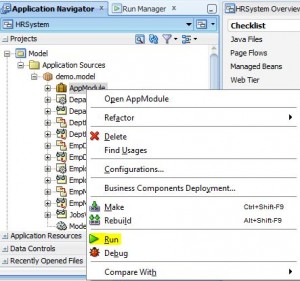
* Expand Model -> Application Sources -> demo.model
* Right click AppModule, click Run
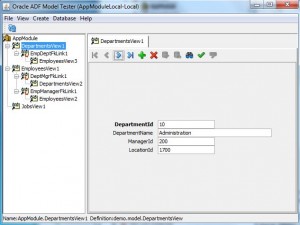
* Test the Swing app
Refine Business Components
* Expand Model -> Application Sources -> demo.model
Refine Salary Attribute with Validation
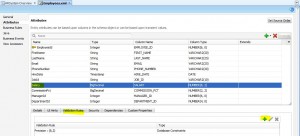
* Double click Employees entity object
* On Employees.xml window,
– Select Attributes -> Salary
– Select Validation Rule tab
– Click green plus sign to add a validation rule
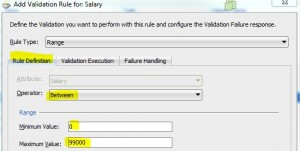
* On Add Validation Rule for: Salary dialog
– Select Rule Type: Range
* On Rule Definition tab:
– Operator: Between
– Min Value: 0
– Max Value: 99000
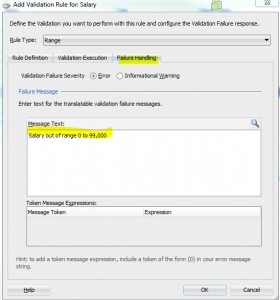
* On Failure Handling tab, set
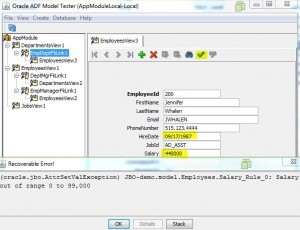
– Message Text: Salary out of range 0 to 99,000
* Click OK button
Refine HireDate with Formatting
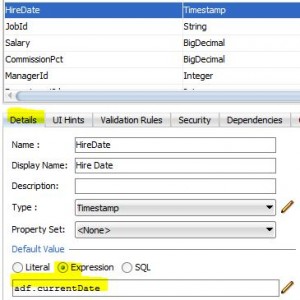
* Select HireDate
* Select Details
– Value Type: Expression
– Value: adf.currentDate
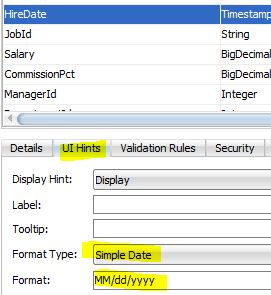
* Click UI Hints tab:
– Format Type: Simple Date
– Format: MM/dd/yyyy
* Save all
Test Refined Business Entity
* Right click AppModule, click Run
* Test
– out of range salary validation
– date format
Create JSF Web pages
* Use ADF Faces Rich Client components
Create a New Web Page
* Right click ViewController, click New…
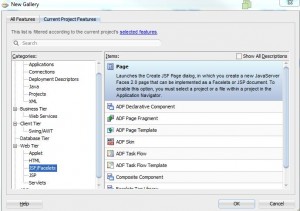
* Select Web Tier -> JSF/Facelets -> Page. Click OK.
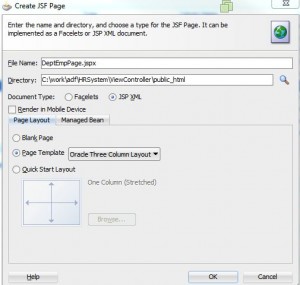
* On Create JSF Page dialog enter:
– File Name: DeptEmpPage.jspx
– Document Type: JSP XML
– Page Template: Oracle Three Column Layout
Change Panel Size
* On DeptEmpPage.jspx design view
– right click the third panel and select Delete
* On Structure pane,
– select af:pageTemplate
* On Property pane,
– startColumnSize: 350
Add Components to Page
Add Accordion
* Drag Component Palette -> Layout -> Panel Accordion to left panel in page editor
* Highlight newly added accordion, enter in the property pane
– Text: Departments
* Right click Departments accordion and choose Insert After Show Details Item – Departments -> Show Detail Item
* Change text to More Info
* Drag a Panel Splitter component to center pane
* In property pane,
– Set Orientation to Vertical
* Drag Panel Collection component to first area of splitter
* Drag Panel Tabbed component to second area of splitter
* Save all
Binding Data Controls to your JSF page
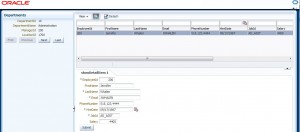
Bind Departments as Read Only Form
* Click Departments accordion to expand it
* Drag Data Controls -> DepartmentsView1 to Departments accordion.
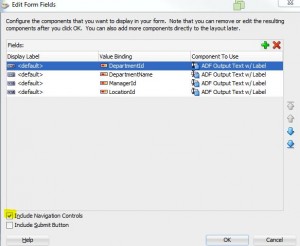
* Choose Forms->ADF Read-Only Form.
* In the Edit Form Fields dialog, check the Include Navigation Controls check box.
* Click OK
Bind EmployeesView3 as Read Only Table
* Drag Data Controls -> DepartmentsView1 -> EmployeesView3 to Panel Collection top part
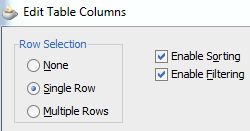
* Choose Tables -> ADF Read-Only Table
* Check
– Row Selection: Single Row
– Sorting
– Filtering
* Click OK
Bind EmployeesView3 as ADF Form
* Drag Data Controls -> DepartmentsView1 -> EmployeesView3 to Panel Collection bottom part
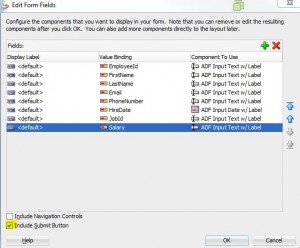
* Choose Form -> ADF Form
* In the Edit Form Fields dialog,
– Check the check boxes for “Include Submit Button”
– Delete following fields from the list
CommissionPCT,
ManagerId,
DepartmentID
* Click OK
* Save All
Test Page
* Right click DeptEmpPage.jspx and select Run
* Web page show up at http://127.0.0.1:7101/HRSystem-ViewController-context-root/faces/DeptEmpPage.jspx
Enhancing your JSF page
Add graph representation
* On Structure pane, click af:table -t1
* On property pane, select ColumnSelection: Single
* Expand More Info accordion
* Drag “Data Controls -> DepartmentsView1 -> EmployeesView3” to More Info accordion
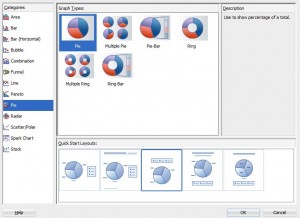
* Choose Graph
* Select
Pie -> Pie
Quick Start Layouts: third from left
* Click OK
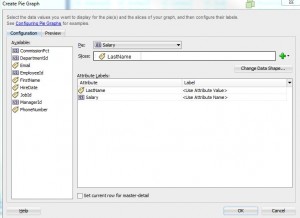
* On Create Pie Graph dialog,
– Pie: Salary
– Slices: LastName
* Click OK
* Click Save All
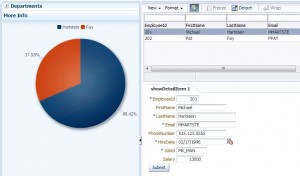
Test Pie Graph
* Right click page and select Run
Adding More Complex Business Services
Add New View Object
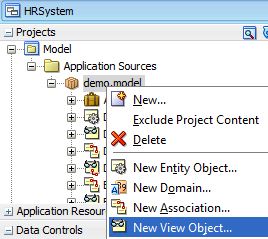
* Right click Model -> Application Soruces -> demo.model
* Select New View Object…
* On Create View Object dialog, enter following and click Next
– Name: EmpDetails
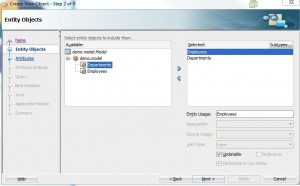
* On Entity Object dialog
– Move Employees from Available to Selected pane
– Then move Departments to Selected pane
– Note that only Employees have Updatable checkbox.
– Click Next
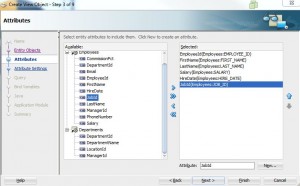
* On Attributes dialog, move following Employees fields to Selected pane
– EmployeeId
– FirstName
– LastName
– Salary
– HireDate
– JobId
* Click Finish button
Add YearlySalary Attribute
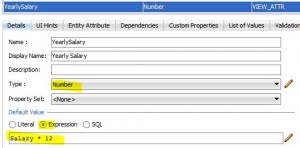
* On EmpDetails.xml editor, click Attributes, then click Create new attribute green plus sign. Enter:
– Name: YearlySalary
– Type: Number
– Default Value Type: Expression
– Value: Salary * 12
* Click OK button
Add View Accessor
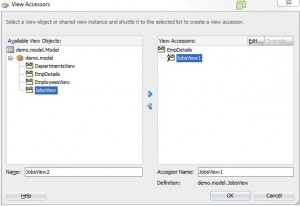
* On EmpDetails.xml editor, click View Accessors, then click Create new view accessors green plus sign.
* On View Accessors dialog,
– Move JobsView to right pane
– Click OK
Add List of Values for JobId
* Back on EmpDetails.xml editor, click Attributes, select JobId
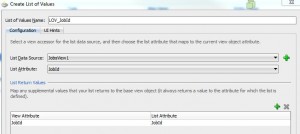
* Click List of Values tab, click green plus sign (add list of values)
* On Create List of Values dialog, select Configuration tab, select:
– List Data Source: JobsView1
– List Attribute: JobId
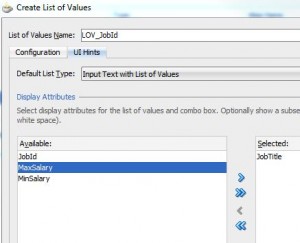
* On UI Hints tab,
– Select Input Text with List of Values
– Move JobTitle to right pane
– Click OK
Add New View Object to AppModule
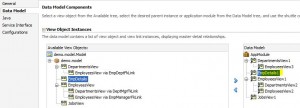
* Double click AppModule
* Select Data Model on left panel
* Move EmpDetails to right side pane
* Save All
Test New View Object
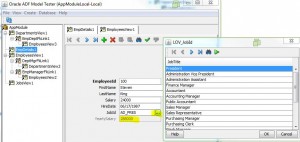
* Right click AppModule and select Run
Creating a Page Flow
Setup Page Flow
* Expand ViewController -> Web Content -> WEB-INF folder
* Double click adfc-config.xml
* Drag and drop the DeptEmpPage.jspx file from the application navigator into the empty adf-config diagram
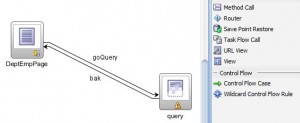
* Drag a new View component onto adf-config diagram. Rename it to query.
* Select Control Flow Case
* Drag a line from DeptEmpPage to query on adf-config editor.
– Name the line goQuery.
* Select Control Flow Case again
* Drag a line from query to DeptEmpPage on adf-config editor. Name the line back.
Create query.jspx Page
* Double click query view in the diagram
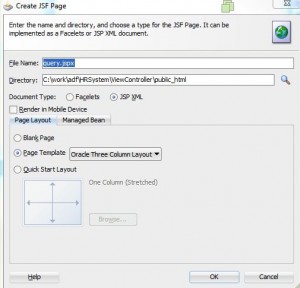
* Select
– Page Template: Oracle Three Column Layout
* Click OK
* Delete start and end panel
* Refresh Data Controls
* Expand EmpDetails1 -> Named Criteria
* Drag All Queriable Attributes to the center pane of query.jspx page
* Choose Query -> ADF Query Panel
* Drag EmpDetails1 from Data Controls to lower part of query page
* Select Form -> ADF Form…
* On Edit Form Fields, check both
– Include Navigation Controls
– Submit Button
* Click OK
Add Submit Button
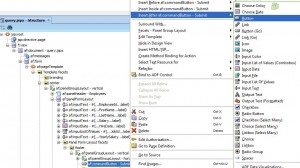
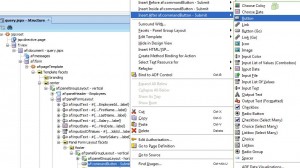
* In the Structure pane, locate af:command:Button – Submit
* Right click af:command:Button – Submit
* Choose Insert after af:command:Button – Submit -> Button
* On property pane for the new button, set:
– Text: Back
– Action: back
Add Commit and Rollback Button
* On Data Controls pane, locate AppModuleDataControl -> Operations
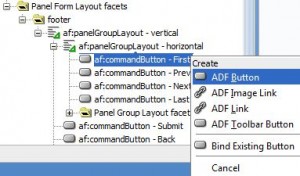
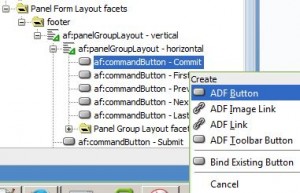
* Drag Commit icon into the structure pane before the ‘af:commandButton – First‘
– choose ADF Button when prompted.
* Drag Rollback icon into the structure pane before the First button, choose ADF Button when prompted.
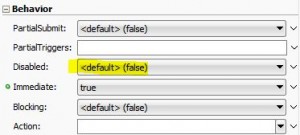
* In the Property Inspector, for the Rollback and for the Commit buttons, set the Behavior > Disabled property to default (false).
Add Query Button
* Open DeptEmpPage.jspx
* Expand Departments accordion
* Drag a button between First and Previous buttons
* On new button property pane, set
– Text: Query
– Action: goQuery
* Save All
Test Page Flow
* Right click DeptEmpPage.jspx
* Select Run
* Click Query button to go to the query page.
* Click Back button to go back to DeptEmpPage page.
Using ADF Faces Framework Features
Using Partial Page Refresh
* Open query.jspx
* Click on Salary row.
* In property pane,
– set Id to sal
– set Behavior -> AutoSubmit to True
* Click on YearlySalary field.
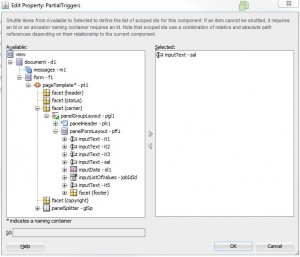
– In property pane, right click Behavior -> ParticalTriggers field, and choose Edit…
– Move “facet(center) -> panelFormLayout – pfl1 -> inputText – sql” to the right side panel.
– Click OK.
* Save all.
Test
* Right click DeptEmpPage.jspx and select Run
* Web page show up at http://127.0.0.1:7101/HRSystem-ViewController-context-root/faces/DeptEmpPage.jspx
* Click Query button in the Departments panel
* Enter A% in the FirstName field in the Employees panel
* Click Search button
* Update the Salary field and click on a different field (such as LastName field)
* Notice that YearlySalary field is updated automatically.
Using Drop Down Menus and Operation Components
* Open DeptEmpPage.jspx
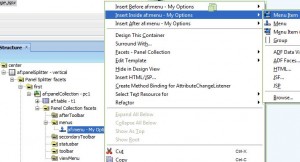
* Right click menu place holder and select Insert inside Facet menus -> Menu
* In property pane,
– set Text field to: My Options
– set Behavior > Detachable property to true
Add Export to Excel Menu Item
* In structure pane,
– right click af:menu – My Options, and
– select Insert inside af:menu – My Options -> Menu Item
* In property pane,
– set Text field to Export to Excel
* Drag “Component Palette -> Operations -> Export Collection Action Listener” to Structure pane’s “af:commandMenuItem – Export to Excel“.
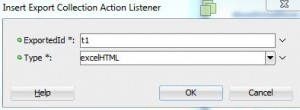
* In “Insert Export Collection Action Listener” dialog,
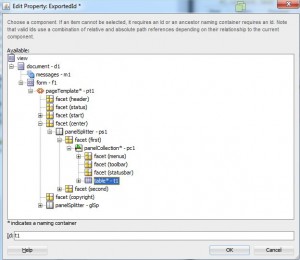
– right click ExportedId field and click Edit…
– select “form – f1 -> facet(center) -> panelSplitter – ps1 -> facet (first) -> panelCollection – pc1 -> table* – t1 ”
– Click OK
– Select excelHTML in Type field, click OK.
Add Printable Page Menu Item
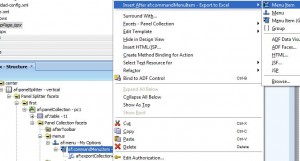
* In Structure pane, right click “af:commandMenuItem – Export to Excel“, and select “Insert After af:commandMenuItem – Export to Excel -> Menu Item”
* In property pane,
– set Text field to Printable Page
* Drag “Component Palette -> Operations -> Show Printable Page Behavior” to the newly added menu item in structure pane.
* Save all
Test
* Right click DeptEmpPage.jspx and select Run
* Web page show up at http://127.0.0.1:7101/HRSystem-ViewController-context-root/faces/DeptEmpPage.jspx
* Test
– detachable menu
– Export to Excel
– Printable Page
Create Read Only Business Services, Page Fragments and Regions
Query Only Business Service Based on Parameters
* In Model folder, right click demo.model, select New View Object…
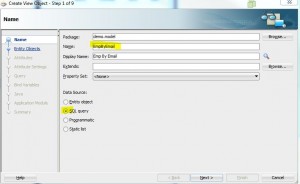
* In Create View Object dialog, set
– Name: EmpByEmail
– checked: SQL query
click Next
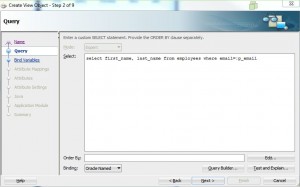
* In Query dialog, enter query statement:
SELECT first_name, last_name FROM employees WHERE email=:p_email
* Click Test and Explain… button, should receive Query is valid confirmation.
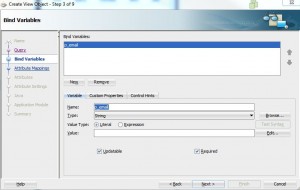
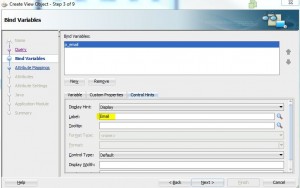
* In Bind Variables dialog, click New button.
– Set Variable -> Name to p_email
– Set Control Hints -> Label to Email
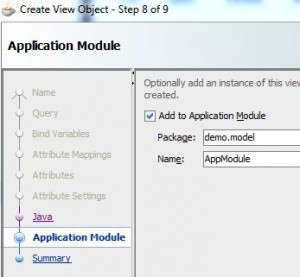
* Click Next until Application Module dialog,
– Check: Add to Application Module
* Click Finish
Test AppModule
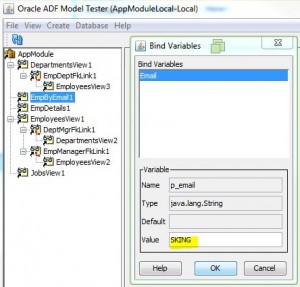
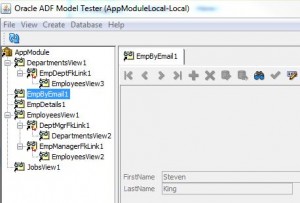
* Right click AppModule and select Run
* Double click EmpByEmail1
* Enter a value in the Bind Variables dialog, e.g. SKING, and click OK
Error
* Error message
attempt to set a parameter name that does not occur in the SQL: Variable
* Cause:
– forgot to set variable name.
* Fix:
– set variable name to p_email.
Reusable Task Flows, Page Fragments and Regions
Create a new task flow
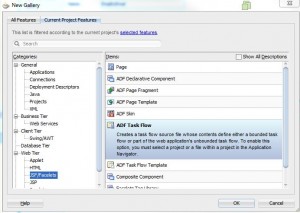
* Right click ViewController, select New…
* In New Gallery dialog, select “Web Tier -> JSF/Facelets -> ADF Task Flow“. Click OK
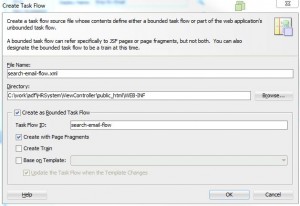
* In Create Task Flow dialog,
– set File Name: search-email-flow.xml
– checked: Create as Bounded Task flow
– checked: Create with Page Fragments
* Click OK
* Drag a View component onto search-email-flow.xml editor, name the view component searchEmail.
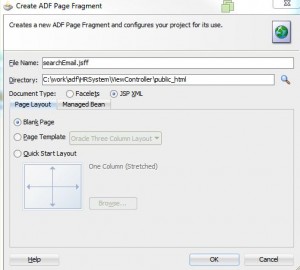
* Double click searchEmail component to create the page.
– Make sure to check Document Type: JSP XML
* Click OK to accept other defaults
Add ExecuteWithParams Button
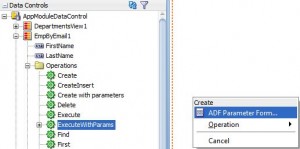
* Select Data Controls -> AppModuleDataControl, click the refresh button. New EmpByEmail1 data control component is shown.
* Expand EmpByEmail1 -> Operations folder
* Drag ExecuteWithParams operation onto the page editor
* Select Create -> ADF Parameter Form…
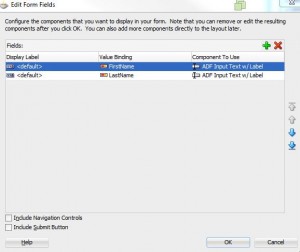
* Change Display Label to Email
– Click OK
* Click ExecuteWithParams button on the design editor
* In property pane,
– set Text: Find Details
Bind EmpByEmail1 Data Control
* Drag Data Controls > AppModuleDataControl > EmpByEmail1 to the right side of Find Details button.
* Select Create -> Form -> ADF Read Only Form…
* Accept defaults in Edit Form Fields dialog by click the OK button.
Add to DeptEmpPage.jspx Page
* Open DeptEmpPage.jspx
* Drag a Separator component (under layout) beneath the Departments form
* Drag “Web Content -> WEB-INF -> search-email-flow.xml” under the new separator.
– Select Create -> Region
* Save all
Test
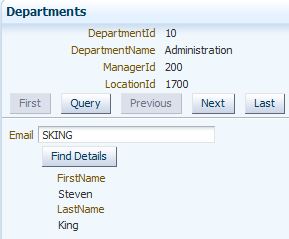
* Run DeptEmpPage.jspx page. You should see the new page fragment.
* Enter a email, e.g. SKING, and click Find Details button.
Using Skins
Create a New Skin
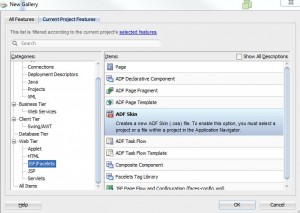
* Right click ViewController project and select New…
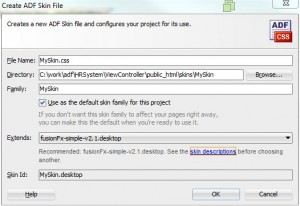
* Select Web Tier > ADF Skin and click OK
* Enter following and accept other default values:
– File Name: MySkin.css
– Check: Use as the default skin family for this project
– Extends: fusionFx-simple-v2.1.desktop
– click OK
* Skin is registered in WEB-INF/trinidad-skins.xml file:
<?xml version="1.0" encoding="windows-1252"?>
<skins xmlns="http://myfaces.apache.org/trinidad/skin">
  <skin>
    <id>MySkin.desktop</id>
    <family>MySkin</family>
    <extends>fusionFx-simple-v2.1.desktop</extends>
    <render-kit-id>org.apache.myfaces.trinidad.desktop</render-kit-id>
    <style-sheet-name>skins/MySkin/MySkin.css</style-sheet-name>
    <bundle-name>demo/view.skinBundle</bundle-name>
  </skin>
</skins>
and selected in WEB-INF/trinidad-config.xml file:
<?xml version="1.0" encoding="windows-1252"?>
<trinidad-config xmlns="http://myfaces.apache.org/trinidad/config">
  <skin-family>MySkin</skin-family>
</trinidad-config>
* Right click DeptEmpPage.jspx and select Run to verify the new skin is loaded.
Change Page Background and Font Family
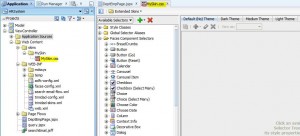
* Open MySkin.css file
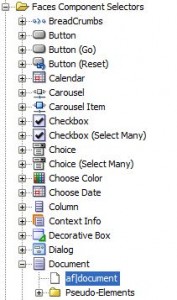
* Go to Faces Component Selectors > Document af|document
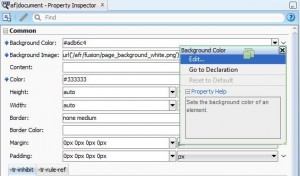
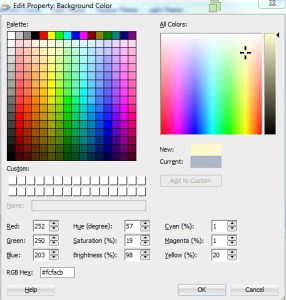
* In property pane, select Common > Background Color > Edit and enter:
– RGB Hex: #fcfacb
* Check new background color by right clicking DeptEmpPage.jspx and select Run
Change Font of Application Text
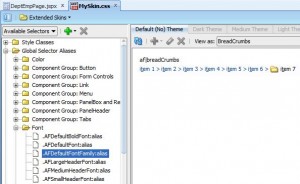
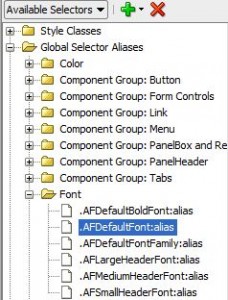
* From MySkin.css, select Global Selector Aliases > Font > .AFDefaultFontFamily:alias
* In property pane, Select:
– Font Family: Times New Romain
* Back in MySkin.css navigator tree, select .AFDefaultFont:alias
* In property pane, select:
– Font Size: medium
– Line Box > Line Height: 18 px
* Save All
* Reload page to see that font size has changed
Format Header
* Set Faces Components Selectors > Panel Header > Pseudo-Elements > title0
– Background Color: #fff27e
* Set Faces Components Selectors > Panel Header > Pseudo-Elements > title-text0
– Font/Text > Color: Red
* Set Faces Components Selectors > Panel Header > Pseudo-Elements > content0
– Common > Background Color: White
– Common > Border: 1px solid
– Common > Border Color: #fff27e
* Save all
* Reload page to see header format change
Format Table Headers
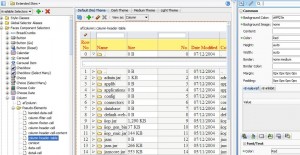
* Set Faces Components Selectors > Column > Pseudo-Elements > column-header-table
– Background Color: #fff27e
– Background Image: none
– Font/Text > Color: Red
* Save all
* Reload page to see column header format
References
*Developing RIA Web Applications with Oracle ADF
* Changing an Application’s Look and Feel by Using Skins









Pingback: Free Providing CertBus Oracle 1Z0-554 VCE Exam Study Guides With New Update Exam Questions | | Pass Ok Ok
Pingback: Latest CertBus 1Z0-554 Exam 1Z0-554 Dumps 100% Free Download | | Pass One Week
Pingback: [Latest Version] Free CertBus Oracle 1Z0-554 PDF Download with 100% Pass GuaranteePass Cisco Exam | Pass Cisco Exam
Pingback: [Free] 2018(Jan) EnsurePass Examcollection Oracle 1z0-554 Dumps with VCE and PDF Download 51-60 | Source for IT Smart Shopping